Contents
- 1 1. Hiking Pack: Your Mobile Basecamp
- 2 2. Water: Staying Hydrated
- 3 3. Food: Fuel for the Trail
- 4 4. Navigation Tools: Staying on Track
- 5 5. Sun Protection: Guarding Against Sunburn
- 6 6. First-Aid Kit: Handling Blisters and Bumps
- 7 7. Knife or Multi-Tool: For Repairs and Meals
- 8 8. Clothing and Footwear: Comfort and Protection
- 9 9. Headlamp: Lighting the Way
- 10 10. Fire and Emergency Shelter: Prepared for the Unexpected
- 11 Enjoying the Trail with the Right Hiking Gear
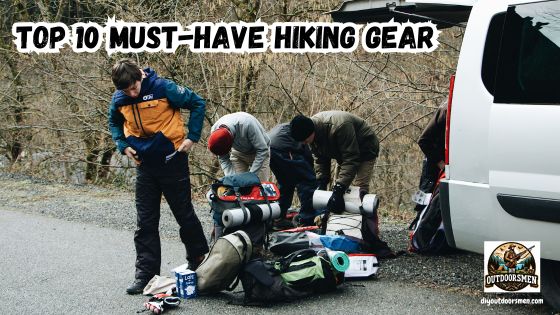
Whether I’m heading out for a quick after-work hike or planning a weekend trek, having the right hiking gear makes a huge difference in how comfortable, safe, and enjoyable my adventure becomes. Spending time on the trails gives me not only a break from my daily routine but also a chance to experience nature and challenge myself.
QUICK LOOK: Must Have Hiking Gear
- Hiking Pack: Everything I need on the trail starts with a good backpack. I look for one that fits comfortably on my back, has adjustable straps, and offers enough space for my essentials. For an afternoon outing, a small daypack is generally enough.
- Water: A sturdy water bottle or a hydration bladder that fits inside my pack keeps sipping easy while I’m on the move. If I know I’ll be near streams or a lake, I pack a lightweight water filter or water purification tablets.
- Food: Energy-rich snacks are a lifesaver when my stomach starts to grumble halfway up a steep incline. I choose foods that are lightweight, easy to eat while walking, and don’t spoil easily. Trail mix, energy bars, nuts, dried fruit, and jerky are long-time favorites of mine.
- Navigation Tools: Navigation tools are a definite must-have when it comes to hiking tools. Even though I use my phone for navigation, I always bring a map and compass as backup. GPS devices and phones can lose their charge or signals, especially far from the city.
- Sun Protection: Even when it’s cloudy, I protect my skin and eyes from the sun’s UV rays. My go-to gear includes a broad-brimmed hat, sunglasses with strong UV protection, sunscreen rated SPF 30 or higher, and light, long-sleeved shirts.
- First Aid Kit: My first aid kit includes adhesive bandages, blister pads, antibiotic ointment, medical tape, gauze, tweezers, and pain relievers. I also include any personal medications I might need.
- Knife or Multi-Tool: A reliable pocket knife or multitool always finds a spot in my hiking gear bag. I use it to cut rope, make repairs, open stubborn food packaging, or prep food. Some multitools have scissors, pliers, or screwdrivers, which come in handy for fixing gear and handling small emergencies.
- Clothing and Footwear: Proper footwear and clothing are the foundation of your hiking gear. Clothes made of moisture-wicking materials that keep me dry and comfortable. In cool weather, I add an insulating midlayer (like a fleece) and a lightweight, waterproof outer layer to block wind and rain.
- Flashlight and Headlamp: I also pack extra batteries, just in case. Flashlights work, but headlamps are much more convenient for setting up camp or handling tasks after dark. Some models let you adjust the brightness or have a red light option to preserve night vision.
- Emergency Shelter: I carry waterproof matches or a lighter, along with a small emergency fire starter. I also slip a lightweight emergency bivy or tarp into my bag, which can shield me from rain or cold if I ever need to wait for help. Even a simple plastic bag or poncho is better than nothing in an emergency.
When I first started hiking regularly, I wasn’t sure what I needed and what was “nice to have.” Over time, I learned the hard way that a missing item, like rain protection or extra snacks, could turn a great outing into an uncomfortable scramble. Packing smart is crucial, especially if I want to stay prepared for unexpected weather, minor injuries, or simply to enjoy the outdoors with much less stress.
This guide outlines the top 10 must-have pieces of hiking gear I always bring on my outdoor excursions. These essentials help me feel ready for whatever the trail throws my way. If you’re gearing up for your own outdoor treks, here’s what I recommend, along with a few tips from my own experience to help you get started.
1. Hiking Pack: Your Mobile Basecamp
Everything I need on the trail starts with a good backpack. I look for one that fits comfortably on my back, has adjustable straps, and offers enough space for my essentials. For an afternoon outing, a small daypack is generally enough.
Longer hikes or trips that require more gear call for a pack with 25-35 liters of capacity. Features like padded hip belts and ventilated back panels help on tough climbs or hot days, making even heavy loads more manageable. Well-designed pockets allow for quick access to snacks, water, or rain gear.
While there’s no perfect backpack, choosing one that matches your adventure and fits your body is important. Many stores will even help fit packs properly, so ask staff for advice if you’re unsure—your back will thank you later.
2. Water: Staying Hydrated
I always carry enough water for the day, even if the hike is short. A sturdy water bottle or a hydration bladder that fits inside my pack keeps sipping easy while I’m on the move. If I know I’ll be near streams or a lake, I pack a lightweight water filter or water purification tablets.
This way, I can refill safely without worrying about germs and stomach issues. Having access to clean water can be a lifesaver, especially in hotter conditions or on remote trails.
Tips for Water Management:
- Estimate about half a liter per hour of moderate activity.
- Plan refills or carry more if it’s hot or the route is long.
- Practice using your filter before you need it in the wild.
- Mark locations of reliable water sources on your map before heading out.
3. Food: Fuel for the Trail
Energy-rich snacks are a lifesaver when my stomach starts to grumble halfway up a steep incline. I choose foods that are lightweight, easy to eat while walking, and don’t spoil easily. Trail mix, energy bars, nuts, dried fruit, and jerky are long-time favorites of mine.
On longer hikes or overnights, I pack instant oatmeal or meals that only need hot water to prepare. A thermos with soup or coffee can be a welcome comfort on cold days.
Don’t forget to bring enough food to replace all the calories you’ll burn, and add a little extra just in case your adventure takes longer than expected. Sometimes I even treat myself to a sweet or salty snack at the summit, which always seems to taste better outdoors!
Navigation tools are a definite must-have when it comes to hiking tools. Even though I use my phone for navigation, I always bring a map and compass as backup. GPS devices and phones can lose their charge or signals, especially far from the city. Before heading out, I double-check my route and save an offline map.
On more remote trails, a simple compass helps me keep my bearings if I ever feel lost. Some watches now also offer basic GPS and compass functions—these tools are great backups and are getting more user-friendly all the time.
- Paper topographic map
- Compass
- GPS device or smartphone with an offline map app
- Guidebook or printed directions for less-marked trails
5. Sun Protection: Guarding Against Sunburn
Even when it’s cloudy, I protect my skin and eyes from the sun’s UV rays. My go-to gear includes a broad-brimmed hat, sunglasses with strong UV protection, sunscreen rated SPF 30 or higher, and light, long-sleeved shirts.
My skin thanks me after a long day outdoors, and I feel less exhausted when I avoid sunburn or overheating. Applying sunscreen before I leave and reapplying every couple of hours makes a major difference. Don’t forget the back of your neck and ears—they can burn quickly!
6. First-Aid Kit: Handling Blisters and Bumps
I’ve learned that even minor scrapes or blisters can mess up a hike. My first aid kit includes adhesive bandages, blister pads, antibiotic ointment, medical tape, gauze, tweezers, and pain relievers. I also include any personal medications I might need.
Keeping everything in a waterproof pouch makes it easy to grab quickly. Adding some allergy medicine and a tick key helps in many parts of the country. For longer adventures, consider adding a small splint or elastic wrap to help with possible sprains.
My Quick-Access Essentials:
- Bandages for blisters and cuts
- Ibuprofen or acetaminophen
- Alcohol wipes or antiseptic
7. Knife or Multi-Tool: For Repairs and Meals
A reliable pocket knife or multitool always finds a spot in my hiking gear bag. I use it to cut rope, make repairs, open stubborn food packaging, or prep food. Some multitools have scissors, pliers, or screwdrivers, which come in handy for fixing gear and handling small emergencies.
A good multitool can also serve for first aid, like trimming dressings or removing splinters. Choose a tool you feel comfortable using, and keep it clean and sharp for best results.
8. Clothing and Footwear: Comfort and Protection
Proper footwear and clothing are the foundation of your hiking gear. Layering is key for me. I wear clothes made of moisture-wicking materials that keep me dry and comfortable. In cool weather, I add an insulating midlayer (like a fleece) and a lightweight, waterproof outer layer to block wind and rain.
My hiking boots or shoes have a solid grip and support, and I always break them in before a big hike. Good socks—preferably wool or synthetic—help prevent blisters and soggy feet.
Footwear Tips:
- Make sure shoes or boots fit well with room for toes to wiggle.
- Carry a spare pair of socks for multiday trips or wet conditions.
- Test your boots on short walks before taking them out on big adventures.
Pack gloves and a warm hat if you’ll be hiking early or late in the season—weather can change suddenly in the mountains. Always check the forecast so you can prepare the right layers.
9. Headlamp: Lighting the Way
Trust me, if you end up in the woods after dark, you will be glad you added lights to your hiking gear. Even if I plan to return before sunset, I keep a headlamp in my pack. Trails can get dark quickly under trees, during cloudy afternoons, or if the hike takes longer than expected. A headlamp leaves my hands free and lets me move safely.
I also pack extra batteries, just in case. Flashlights work, but headlamps are much more convenient for setting up camp or handling tasks after dark. Some models let you adjust the brightness or have a red light option to preserve night vision.
10. Fire and Emergency Shelter: Prepared for the Unexpected
Weather and plans can change fast. I carry waterproof matches or a lighter, along with a small emergency fire starter. While I don’t usually plan to use a fire on short hikes, having this specialized hiking gear gives me peace of mind if I need warmth or have to signal for help.
I also slip a lightweight emergency bivy or tarp into my bag, which can shield me from rain or cold if I ever need to wait for help. Even a simple plastic bag or poncho is better than nothing in an emergency.
What Goes in My Emergency Pack:
- Waterproof matches or a reliable lighter
- Compact emergency blanket or bivy sack
- Small, lightweight tarp
- Whistle to signal rescuers
Enjoying the Trail with the Right Hiking Gear
Trail adventures are more enjoyable and safer when I take time to prepare. Packing these ten pieces of hiking gear helps me stay comfortable, find my way, and handle surprises without stress. Each item has earned its place in my kit by coming through when I needed it most.
Whether you’re brand new to hiking or adding to your gear collection, these essentials help you get the most out of every trail experience. Grab your pack, do a quick hiking gear check, then hit the trail with some added confidence and peace of mind. Safe and happy hiking!
Most Recent Articles:
- Off-road Vehicle Recovery Techniques
- Electric Vs. Manual Game Calls and Which Works Better?

- Comparing All-Terrain UTV Winches For Remote Hunting Access

- How To Create Wildlife Bait From Kitchen Scraps

- Reliable Trail Camera Rigs For Hunters On A Tight Budget
- Suburban Bowhunting Tips

As always, stay safe, enjoy the journey, and please try to leave it cleaner than you found it. If you have any comments, questions, ideas, or suggestions, please leave them in the comment section below, and I’ll get back to you ASAP. You can follow us on YouTube: Man Art Creations for videos of our DIY Adventures.
P.S. Thanks so much for checking out our blog; we really appreciate it. Just so you know, we may receive a commission if you click on some of the links that appear on our site. This helps us keep our content free and up-to-date for everyone. We appreciate your support!

