Contents
- 1 Step 1: Understanding the Importance of a Precise Zero
- 2 Step 2: Gathering the Right Equipment
- 3 Step 3: Establishing a Stable Shooting Position
- 4 Step 4: Zeroing Your Rifle at 100 Yards
- 5 Step 5: Accounting for Long-Range Variables
- 6 Step 6: Maintaining Consistency and Adjusting Over Time
- 7 Step 7: Troubleshooting Common Challenges
- 8 Frequently Asked Questions and Common Mistakes when Zeroing Your Rifle
- 8.1 What should I do if my shots are consistently off target?
- 8.2 How do I handle inconsistent ammunition performance?
- 8.3 How can I reduce human error during shooting?
- 8.4 What if my initial zero is slightly off?
- 8.5 How can I better estimate environmental conditions?
- 8.6 What common mistakes should I avoid?
- 9 Final Thoughts and Next Steps in Zeroing Your Rifle
Zeroing your rifle for Long-range shooting requires that every detail is carefully considered. A precise zero is the cornerstone of any successful long-range shot. If your rifle zero is off even slightly at close range, these errors only grow at longer distances. A solid zero forms the base for any subsequent adjustments for environmental factors.
QUICK LOOK: Zeroing Your Rifle for Long-Range Shots
- Know What Zero Means: Before adjusting sights or scopes, it is important to know what a rifle zero means. The zero is the point where the bullet’s impact matches your point of aim.
- Proper Equipment: When zeroing your rifle, having reliable equipment sets you up for success. I use precision rifles with heavy barrels and adjustable stocks. The right caliber known for long-distance performance also plays a big role in accuracy. It is important to use tools that fit the shooting discipline you want to master.
- Stable Shooting Position: A stable shooting position is key to precision when zeroing your rifle. A steady stance minimizes movement and keeps the rifle aligned with your target.
- Zero at 100 Yards First: This step is about establishing an accurate zero at 100 yards. Beginning at this distance offers a practical baseline and builds confidence for further adjustments over longer distances.
- Account for Environmental Factors: After zeroing your rifle at 100 yards, it’s important to understand the factors that influence bullet trajectory at longer ranges. Shooting at 1,000 yards brings several variables into play.
- Continued Practice and Adjustments: Precision shooting isn’t only about the initial settings—it also requires ongoing practice and regular checks. Environmental conditions change, and even the best equipment can shift over time.
- Troubleshoot Common Problems: When zeroing your rifle, even with best practices, not every session goes as planned. I sometimes face issues with wind estimation, equipment shifts, or rapidly changing weather. Knowing a few troubleshooting steps can help get you back on track quickly.
Whether you are using a precision rifle or a custom-built setup, starting with a proper zero at 100 yards is essential. Small discrepancies can result in much larger errors when wind, atmospheric conditions, and human factors like trigger control come into play. This guide explains how I set up my rifle for long-range accuracy and why starting with an accurate zero truly makes all the difference.
Step 1: Understanding the Importance of a Precise Zero
Before adjusting sights or scopes, it is important to know what a rifle zero means. The zero is the point where the bullet’s impact matches your point of aim. Getting it right at 100 yards is critical because small deviations can multiply when shooting at ranges like 1,000 yards. A minor error of two-tenths of an inch at 100 yards can translate to a two-inch error at 1,000 yards. With environmental and human factors added, these errors can become even more significant.
An accurate zero sets a consistent baseline so that even the best range adjustments for wind and elevation will work effectively. A misaligned zero compounds every other variable in long-range shooting, which is why I spend time ensuring that my zero is as perfect as possible.
Key Points to Consider:
- Minor deviations at 100 yards lead to larger errors at extended distances.
- A solid zero makes later adjustments for wind and weather easier.
- Starting with an accurate zero underpins all advanced long-range shooting techniques.
Step 2: Gathering the Right Equipment
When zeroing your rifle, having reliable equipment sets you up for success. I use precision rifles with heavy barrels and adjustable stocks. The right caliber known for long-distance performance also plays a big role in accuracy. It is important to use tools that fit the shooting discipline you want to master.
Essential Equipment Considerations for Zeroing Your Rifle:
- Rifle: A precision rifle with a heavy barrel helps maintain stability. An adjustable stock ensures your sight alignment is correct.
- Scope: A high-quality scope with windage and elevation turrets is necessary. Good optics provide clarity and allow for fine adjustments.
- Ammunition: Consistency is very important. I choose match-grade ammunition with tight tolerances to ensure bullet performance remains steady shot after shot.
- Accessories: A sturdy bipod or tripod keeps your position stable. I also use a rangefinder, spotting scope, and ballistic calculator to better understand the shooting conditions.
Investing in the right gear reduces the variables that could compromise your rifle’s zero. Even a perfect zero might not give reliable results if your tools are not dependable.
Step 3: Establishing a Stable Shooting Position
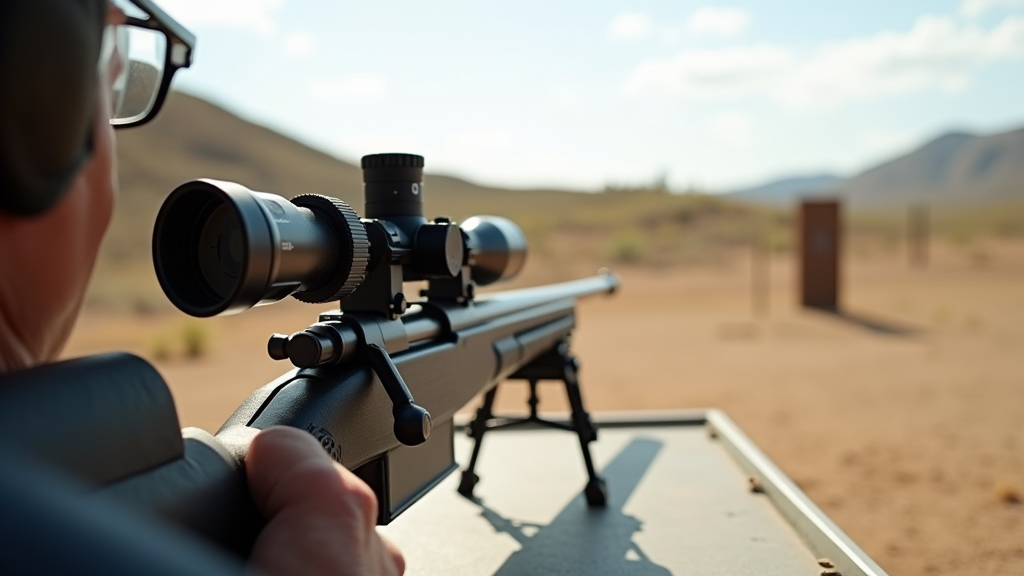
A stable shooting position is key to precision when zeroing your rifle. A steady stance minimizes movement and keeps the rifle aligned with your target. I find that using a bipod or tripod is most effective for long-range shots.
Considerations for a Stable Position:
- Stance: Whether shooting prone, seated, or standing, aim for a position that restricts body movement. A sound posture helps maintain consistent rifle alignment.
- Grip and Trigger Control: A firm, steady grip keeps the rifle from shifting when pulling the trigger. Smooth trigger control prevents disturbing the aim.
- Breathing Technique: Controlled breathing minimizes movement. I take a deep breath, slowly exhale, and then take the shot to stay stable.
Without a proper shooting position, even a carefully zeroed rifle can stray from its intended path. A good stance reduces errors caused by movement.
Step 4: Zeroing Your Rifle at 100 Yards
This step is about establishing an accurate zero at 100 yards. Beginning at this distance offers a practical baseline and builds confidence for further adjustments over longer distances.
The Process of Zeroing Your Rifle:
- Initial Setup: Secure your rifle on a stable platform. A steady rifle minimizes errors during the initial trials.
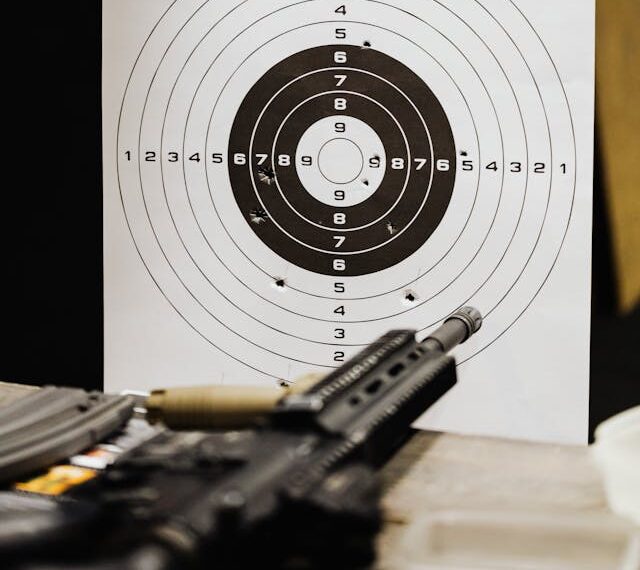
- Adjusting the Scope: Align the bulls-eye with the target at 100 yards. Adjust the scope’s elevation and windage until the impact aligns with your aim.
- Firing Groups: Fire a group of shots to see if further adjustments are needed. Consistency in the group confirms a reliable zero.
- Fine-tuning: Make minor turret adjustments and fire additional groups until your impact point is centered on your target.
This methodical approach helps avoid errors that become magnified at longer distances. It only takes a small misalignment to cost you a target on the range.
Step 5: Accounting for Long-Range Variables
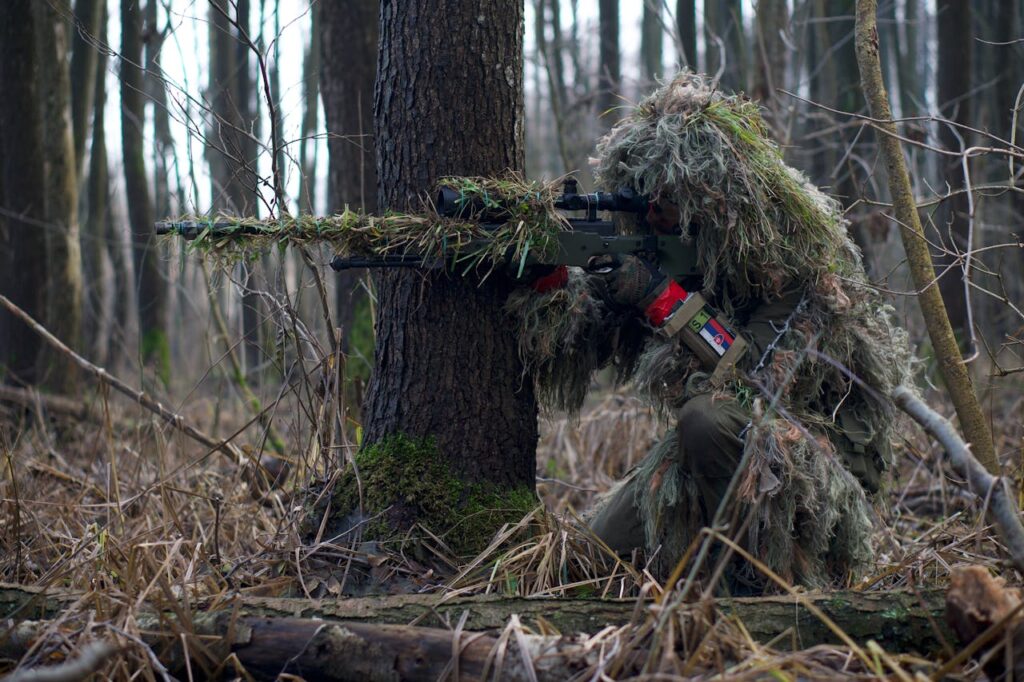
After zeroing your rifle at 100 yards, it’s important to understand the factors that influence bullet trajectory at longer ranges. Shooting at 1,000 yards brings several variables into play. By paying attention to these effects, you can keep your accuracy intact over extended distances.
Key External Factors:
- Wind: A slight crosswind can alter a bullet’s path. I use wind flags or sensors to adjust my scope’s windage turret.
- Atmospheric Conditions: Air pressure, altitude, and temperature all affect bullet flight. Weather data and ballistic calculators help guide these adjustments.
- Bullet Characteristics: The bullet’s shape and weight, reflected in its ballistic coefficient, influence mid-flight behavior. Using match-grade rounds supports consistent performance.
- Firing Adjustments: Even with a perfect zero, variations like muzzle velocity differences or minor ammo inconsistencies require occasional tweaks.
- Human Factors: Slight differences in trigger pull or body movement can affect accuracy. A small margin for error is always wise.
By understanding these variables, I can reduce surprises on the range and ensure that my shots remain on target, even under challenging conditions.
Step 6: Maintaining Consistency and Adjusting Over Time
Precision shooting isn’t only about the initial settings—it also requires ongoing practice and regular checks. Environmental conditions change, and even the best equipment can shift over time. I have a routine for periodic inspections and adjustments.
Tips for Consistent Accuracy:
- Frequent Zero Checks: I periodically confirm my zero, especially when I notice a pattern of missed shots.
- Record Keeping: Documenting weather and adjustments helps me understand how conditions affect my performance over time.
- Adaptability: I remain flexible. If the weather changes or I switch ammunition, I adjust my scope settings as needed.
- Routine Maintenance: Regular cleaning of the rifle and scope prevents debris from affecting performance.
This consistency builds confidence. Keeping track of small adjustments not only prevents bad habits but also helps refine your shooting skills.
Step 7: Troubleshooting Common Challenges
When zeroing your rifle, even with best practices, not every session goes as planned. I sometimes face issues with wind estimation, equipment shifts, or rapidly changing weather. Knowing a few troubleshooting steps can help get you back on track quickly.
Frequently Asked Questions and Common Mistakes when Zeroing Your Rifle
What should I do if my shots are consistently off target?
If I notice a consistent error, I recheck the zero at 100 yards first. Often, a small misalignment is to blame. I then review environmental factors like wind and temperature to pinpoint the cause.
How do I handle inconsistent ammunition performance?
If shot groups vary, I confirm that my ammo is match grade and the rifle chamber is clean. Taking a few extra groups usually smooths out minor variations.
How can I reduce human error during shooting?
I work on improving my stance, breathing, and trigger control. Training to keep movements minimal is very important for maintaining accuracy.
What if my initial zero is slightly off?
A small error at 100 yards can lead to larger mistakes at 1,000 yards. I always ensure the zero is carefully adjusted before moving on to longer distances.
How can I better estimate environmental conditions?
I pay extra attention to wind and weather changes. Tools like wind meters and trusted weather reports help me stay informed. Consistent observation is key.
What common mistakes should I avoid?
Skipping initial zeroing steps in a rush.
Relying solely on firing solutions without on-range validation.
Neglecting routine maintenance and equipment checks.
Overlooking changes in ammunition batches.
Recognizing these pitfalls early and correcting them builds long-term accuracy and confidence.
Final Thoughts and Next Steps in Zeroing Your Rifle
A well-set rifle zero is the bedrock of long-range shooting success. Through careful setup, ongoing practice, and attention to detail, you can achieve reliable accuracy. Every session not only sharpens your technical skills but also deepens your understanding of the environmental effects on your shot.
The process involves gathering the right equipment, securing a stable shooting position, methodically zeroing at 100 yards, and then making necessary adjustments for long-range factors. This approach reinforces the importance of having a solid baseline before adding further firing solutions.
Your Action Plan:
- Ensure your rifle is securely mounted and in optimal condition, before you head to the range.
- Zero your rifle meticulously at 100 yards and recheck until your groupings are tight.
- Record the settings and environmental conditions to guide future adjustments.
- Gradually test longer distances while adjusting for wind, air pressure, and other variables.
- Review your performance regularly and refine both your shooting technique and equipment maintenance.
Every shooter faces challenges when outcomes don’t match expectations. However, steady adjustments and disciplined practice can only take your skills to the next level. This guide provides an all-in-one overview refined over years of practice. I encourage you to be patient, test these methods, and adjust them until they perfectly match your shooting style. Your efforts today will shine through in the precision of your shots tomorrow.
What strategies or equipment have worked best for you in honing long-range accuracy? Test these ideas, make careful adjustments, and enjoy the rewards of a well-zeroed rifle on the range.
Investing time in understanding your rifle, optimizing your gear, and practicing a disciplined routine lays the groundwork for precise long-range shooting. As conditions change, your ability to adjust will keep your performance sharp. Every session builds a reliable shooting system, starting with an accurate zero that anchors all your shots.
May this guide serve as a valuable reference as you zero your rifle and prepare for long-range adventures. The effort you put into establishing consistency today will be reflected in the precision of your shots tomorrow.
Check Out These Recent Articles:
- Communication In Remote Hunting Areas With No Cell Service
- Eberlestock Backpacks: Customizing Your DIY Hunting Loadout
- DIY Weekend Warrior Hunting Trips

- Leupold’s Precision Scopes: Elevating DIY Hunting Accuracy

- Without a GPS Signal How do You Navigate Backcountry Trails?

- Vortex Optics Essentials: Hunting Scope Guide For The Serious Outdoorsman

As always, stay safe, enjoy the journey and please try to leave it cleaner than you found it. If you have any comments, questions, ideas, or suggestions please leave them in the comment section below and I’ll get back to you ASAP. You can follow us on YouTube: Man Art Creations for videos of our DIY Adventures.
P.S. – Thanks so much for checking out our blog we really appreciate it. Just so you know, we may receive a commission if you click on some of the links that appear on our site. This helps us keep our content free and up-to-date for everyone. We appreciate your support!

