Contents
- 1 Step 1: Evaluate Your Current Setup
- 2 Step 2: Prepare and Clean Your Equipment
- 3 Step 3: Establish Your Baseline Shooting Distance
- 4 Step 4: Adjust the Windage and Elevation Screws
- 5 Step 5: Verify Accuracy With Field Testing
- 6 Step 6: Optimize Shooting Conditions for Calibration
- 7 Step 7: Maintain Consistency and Update Your Calibration
- 8 Common Questions & Troubleshooting
- 9 Final Thoughts & Next Steps
- 10 Extra Tips and Considerations for Calibration Excellence
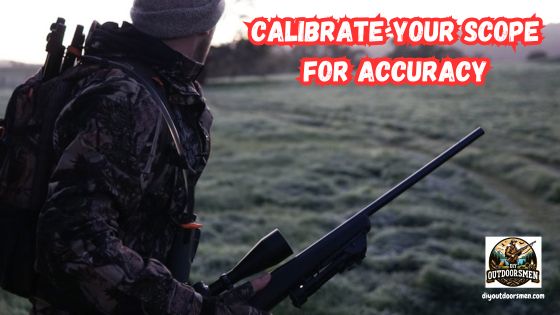
Many shooters appreciate the importance of a well-calibrated scope. A properly tuned scope can improve your accuracy and confidence when aiming at targets. However, adjusting your scope to match your shooting conditions and specific equipment can be challenging. This guide explains how to calibrate your scope for maximum accuracy.
QUICK LOOK: 6 Steps to Calibrate Your Scope
- Inspect your current equipment carefully and note any issues.
- Clean all components thoroughly before beginning the calibration procedure.
- Establish a controlled environment and select a consistent shooting distance.
- Make incremental adjustments using windage and elevation controls until the target is reliably hit.
- Conduct field tests to verify accuracy and document your results.
- Keep records of environmental conditions and any noticeable changes in performance. Update your calibration whenever significant shifts occur.
If you have experienced inconsistent shots or are not getting the hit locations you expect, calibrating your scope might be the solution. A methodical approach can help you eliminate errors and adapt your setup to environmental factors, equipment variations, and personal shooting style. By following the steps outlined below, you can fine-tune your scope so that your point-of-impact aligns with your point-of-aim.
This guide provides super detailed instructions on how to assess your current setup, make necessary adjustments, and verify the calibration under realistic conditions. Whether you are a seasoned marksman or just beginning, careful calibration can step up your shooting experience and improve overall performance.
Step 1: Evaluate Your Current Setup
The first step in calibrating your scope is to understand your current setup. This means inspecting your scope, mount, and the firearm. Examine whether the scope is securely attached and if there are any signs of wear or damage.
The accuracy of a scope is affected by its mounting system and the condition of the reticle. Taking time to assess these details gives you a clear idea of where improvements are needed before progressing further.
Questions to Make a Careful Assessment:
- Is the scope firmly mounted or are there any loose parts?
- Have you noticed shifts in the point-of-impact when recoil is felt?
- Do you use the scope in varied environmental conditions?
- Are all screws and adjustment knobs functioning properly?
Typical Issues to Look For:
- Loose mounting rings that can lead to inconsistent zeroing.
- Dirty or scratched lenses that may distort the reticle’s clarity.
- Inadequate windage or elevation adjustments due to worn components.
- Environmental factors like temperature variations affecting the optics.
Understanding these factors forms the foundation for successful calibration. It also helps pinpoint which adjustments are necessary before you move on to the more technical steps involved in fine-tuning your setup.
Step 2: Prepare and Clean Your Equipment
Preparing your equipment is an essential step before making any adjustments. A clean and well-maintained scope will yield more reliable results. Begin by cleaning the lenses, mounts, and any other moving parts. Dust, oil, or debris can influence the calibration and reduce the clarity of the reticle, so taking the extra time to clean is very important.
Key Preparation Actions:
- Clean the lenses using appropriate cleaning solutions and microfiber cloths.
- Inspect the mounts and rings for any loose screws or indications of corrosion.
- Check that all adjustment knobs turn smoothly without resistance.
- Ensure the reticle remains clear and free from smudges or other obstructions.
Tips and Best Practices:
Perform a thorough inspection under bright lighting. A soft brush can help remove any debris without scratching surfaces. Taking the time to maintain your equipment not only prevents calibration issues later but also extends the life of your gear. Regular cleaning and maintenance make sure that every shot counts.
Step 3: Establish Your Baseline Shooting Distance
Before adjusting your scope, it is vital to set a concrete baseline or reference point. This involves selecting the proper shooting distance for calibration and zeroing. The chosen distance should reflect where you most often engage your targets. A consistent distance ensures that your calibration is both reliable and repeatable.
Guidelines for Selecting a Shooting Distance:
- Identify the distance at which you usually shoot or practice.
- Account for environmental factors such as wind or elevation changes that might influence the bullet’s path.
- A steady and consistent distance will yield more accurate zeroing results.
Setting Up Your Zeroing Target:
Securely mount a target at the chosen distance and mark its center as your reference point. Firing a few groups of shots will help you determine the current point-of-impact versus the desired point-of-aim. It is essential to document any differences in windage or elevation to know exactly what adjustments need to be made.
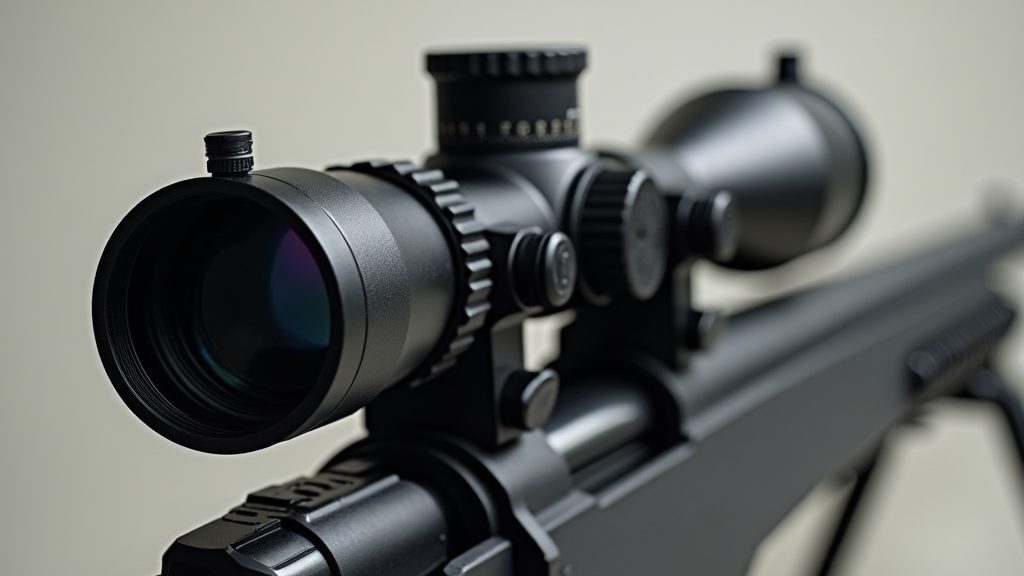
Step 4: Adjust the Windage and Elevation Screws
Now that your baseline is set, you can begin making adjustments to your scope’s windage and elevation settings. This step forms the core of the calibration process. Each scope comes with adjustment knobs that you can turn to shift the reticle, aligning it more closely with the actual impact of your rounds.
Understanding Adjustment Mechanisms:
- The windage knob controls left and right corrections, ensuring the reticle is properly aligned horizontally.
- The elevation knob adjusts the reticle vertically so that it matches the point-of-impact.
- Always follow the manufacturer’s instructions regarding the increments of adjustment to understand how much each tweak affects the impact point.
Calibration Process:
Fire a controlled group of shots and record where the rounds hit relative to your target’s center. Make incremental adjustments to the windage and elevation screws before testing again. It is important to wait between adjustments to gauge the impact of each change properly. Patience is essential as rushing through adjustments could lead to overcorrection.
Step 5: Verify Accuracy With Field Testing
Once you have made adjustments at your established baseline, testing your calibration under real conditions becomes the next priority. Field testing provides invaluable feedback on how your scope performs in practical scenarios and ensures that your adjustments hold true beyond the controlled environment of the range.
How to Test Your Calibration Effectively:
- Set up a target at your usual shooting distance.
- Fire a group of rounds while maintaining a consistent shooting technique.
- Check if the point-of-impact consistently aligns with the reticle’s crosshair.
Consider Environmental Influences:
- Test your scope in various lighting and weather conditions, as temperature and natural light can change optical performance.
- Assess how wind and elevation variations affect your round’s trajectory.
- If significant discrepancies occur, re-calibration may be required.
Field testing not only confirms that your adjustments are correct but also helps you become more acquainted with how your equipment behaves under different circumstances.
Step 6: Optimize Shooting Conditions for Calibration
Your surrounding environment plays a significant role in the lasting accuracy of your calibration. Optimizing shooting conditions can significantly reduce unexpected variations during practice and competitions. The key is to create a controlled setting that minimizes external errors.
Strategies to Step Up Your Calibration Environment:
- Use a stable shooting rest to reduce movement during the calibration process.
- Control as many external variables as possible, including wind and temperature.
- Prepare your firearm and scope ahead of time—ideally the night before you calibrate—to promote consistency.
- Record environmental conditions like temperature, humidity, and wind direction to refer back to during future calibrations.
Even small improvements in your shooting environment can lead to more consistent calibration outcomes. A well-maintained setting forms a reliable benchmark for making future adjustments.
Step 7: Maintain Consistency and Update Your Calibration
Calibrating your scope is not a one-off task. Over time, equipment may shift and environmental conditions may change. Regular checks and routine adjustments are essential to maintaining long-term accuracy.
Maintaining Long-Term Accuracy:
- Keep a detailed calibration log that records every adjustment and notes the environmental conditions during each session.
- Check your scope periodically for any loosening of components or drifting adjustments.
- Re-calibrate whenever you notice significant changes in your shooting performance.
- Invest in quality cleaning and maintenance tools to extend the life of your equipment.
Regular maintenance and timely adjustments help ensure that your scope remains reliable and accurate over the long term. Consistent checks are very important for preserving shooting precision.
Common Questions & Troubleshooting
What should I do if my scope appears to shift after every shot?
If you notice that your scope shifts with each shot, start by checking that all mounts are secure. Tighten any loose screws and re-check the stability of the setup. Cleaning the scope thoroughly to remove oil and debris may also reduce unwanted movement.
Why might my point-of-impact still be off even after making adjustments?
If your adjustments do not align the reticle with the bullet impact as expected, consider external factors such as wind or temperature fluctuations. It’s also wise to re-check your measured baseline and confirm that your firearm is operating consistently. Even minor inconsistencies in shooting technique can change the results significantly.
How can I tell if my calibration is consistent with different ammunition types?
Test your scope with the specific ammunition you use most frequently.
Notice that different loads might require slight modifications in your adjustments.
Keep records of where groups of shots land when using various types of ammunition to better understand their behaviors under identical conditions.
If you often switch brands or bullet weights, consider recalibrating to accommodate these variations.
What if I encounter a mechanical problem with my scope?
If any part of your scope appears damaged or malfunctioning, consult the manufacturer’s guidelines or seek professional repair services. Continuing to use a compromised scope can lead to unreliable results and safety issues.
Final Thoughts & Next Steps
A well-calibrated scope is key to a successful shooting experience by ensuring consistent accuracy and dependable performance. By taking a systematic approach to evaluate your equipment, clean and prepare your gear, set a reliable baseline, make precise adjustments, and perform thorough field testing, you can achieve a setup that truly matches your shooting style.
Your Action Plan:
- Inspect your current equipment carefully and note any issues.
- Clean all components thoroughly before beginning the calibration procedure.
- Establish a controlled environment and select a consistent shooting distance.
- Make incremental adjustments using windage and elevation controls until the target is reliably hit.
- Conduct field tests to verify accuracy and document your results.
- Keep records of environmental conditions and any noticeable changes in performance. Update your calibration whenever significant shifts occur.
Improving your scope calibration is an ongoing process that benefits from regular review and a keen attention to detail. With patience and careful work, you can achieve the level of precision needed for both recreational and competitive shooting.
I encourage you to try these steps and monitor the improvements in your shooting precision. Feel free to share your experiences or ask questions if you run into any issues along the way.
Extra Tips and Considerations for Calibration Excellence
To further ensure your calibration efforts yield excellent results, here are some additional tips and insights drawn from expert shooters. First, always take a few extra minutes at the range to verify that environmental conditions remain stable during your calibration session.
Sometimes, a slight variation in humidity or temperature can subtly change the performance of your scope. By keeping an eye on these factors, you can adjust your shooting technique and equipment setup accordingly.
Another useful strategy is to periodically re-assess your equipment even when everything appears to be functioning perfectly. Over time, repeated use and environmental exposure can slowly alter the integrity of the mounting system and optical elements.
Maintaining a schedule to check all components can help catch minor issues before they develop into major problems. Additionally, consider experimenting with multiple ammunition types during your calibration sessions.
Testing different loads under the same conditions can help you understand how each round behaves and allow you to fine-tune your scope for various shooting scenarios. Recording these observations in a calibration log can prove invaluable later when trying to replicate successful adjustments.
It is also worthwhile to engage with other experienced shooters. Sharing tips and comparing notes on calibration techniques not only broadens your understanding but also gives you an opportunity to pick up small adjustments that others have found useful.
Peer feedback can be a powerful tool in perfecting your method, and discussing challenges may even reveal innovative approaches to solving calibration issues. Finally, always approach each calibration session with a mindset geared toward gradual improvement.
Instead of expecting instant perfection, focus on making measured, small adjustments and evaluating their impact over time. This methodical approach can help you avoid overcorrection and ultimately lead to a far more reliable and tuned shooting system.
By incorporating these extra tips into your routine, you not only refine your calibration process but also build a deeper understanding of the intricate relationship between your equipment and environmental conditions. This knowledge can truly step up your overall shooting performance and ensure that your scope remains accurate shot after shot.
Check Out Our Latest Articles:
- Communication In Remote Hunting Areas With No Cell Service

- Eberlestock Backpacks: Customizing Your DIY Hunting Loadout

- DIY Weekend Warrior Hunting Trips

- Leupold’s Precision Scopes: Elevating DIY Hunting Accuracy

- Without a GPS Signal How do You Navigate Backcountry Trails?

- Vortex Optics Essentials: Hunting Scope Guide For The Serious Outdoorsman

As always, stay safe, enjoy the journey and please try to leave it cleaner than you found it. If you have any comments, questions, ideas, or suggestions please leave them in the comment section below and I’ll get back to you ASAP. You can follow us on YouTube: Man Art Creations for videos of our DIY Adventures.
P.S. – Thanks so much for checking out our blog we really appreciate it. Just so you know, we may receive a commission if you click on some of the links that appear on our site. This helps us keep our content free and up-to-date for everyone. We appreciate your support!
