Contents
- 1 Essential Materials for DIY Archery Targets
- 2 Getting Started with Your DIY Archery Target Project
- 3 Quick Guide to Constructing Your Archery Target
- 4 Things to Consider Before Building Your DIY Archery Target
- 5 Advanced Design Tips and Creative Enhancements
- 6 The Basics: Key Components for a Successful DIY Archery Target
- 7 DIY Archery Targets Frequently Asked Questions
- 8 Maintenance and Care for Your Target
- 9 Final Thoughts on DIY Archery Targets
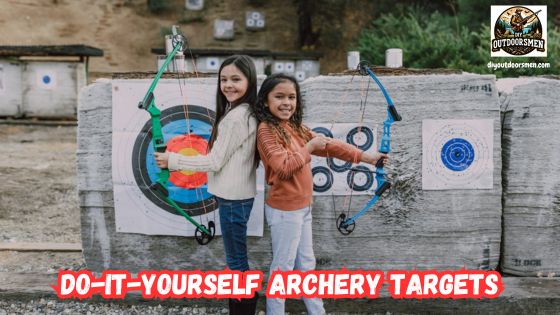
DIY archery targets can be both fun to build and very useful for anyone interested in the sport. I enjoy working with my hands and creating practical projects that step up my hobby. In this article I share ideas for constructing targets that suit both beginners and those with some experience. This guide covers everything from choosing the right materials to refining your design for safety and durability.
QUICK LOOK: Steps for DIY Archery Targets
- Choose your design and location: Decide whether the target will be stationary, free-standing, or hanging. Pick a safe and clear space for your target.
- Gather materials: Collect all the supplies you need such as wood, foam, layers of fabric, and protective coverings.
- Create the base structure: Cut the wood into the desired dimensions and assemble a frame that can support the weight of the other layers.
- Add impact layers: Attach foam or recycled materials inside the frame. These layers help to absorb the force of arrows hitting the target.
- Secure the outer casing: Cover the impact layers with burlap or another durable fabric. Secure the edges so that the layers stay in place during use.
- Test and adjust: Once assembled, try shooting a few arrows. Based on the impact and wear, make adjustments to improve safety and longevity.
Essential Materials for DIY Archery Targets
Choosing the right materials is an important step when planning your DIY archery target project. I have found that using accessible and inexpensive items can provide quality results. Many people use layers of recycled foam, burlap, plywood, and even old tires.
These materials work well together to absorb arrow impacts and reduce damage. By using recycled and affordable sources, you not only create a functional target but also avoid unnecessary spending.Wood remains a popular choice for the frame and support of the target.
Plywood or reclaimed wood makes a sturdy base that holds up under repeated use. I also like combining this with a softer target face. Items such as old carpet remnants or layers of foam create an impact-absorbing layer. A burlap cover can be added to protect the soft layers and give the target a finished look.
Getting Started with Your DIY Archery Target Project
Starting a DIY archery target project requires a clear plan and careful selection of materials. I recommend taking some time to decide on the type of target you want to build. Consider your available space, how many arrows you plan to shoot, and whether the target will be used indoors or outdoors. These factors influence material choices and design features.
Before gathering supplies, I make sure my workspace is suitable. A clean and well-organized area helps avoid mishaps and supports a smooth building process. Additionally, it is helpful to sketch a rough design.
This drawing outlines the dimensions, the layers, and the overall shape of the target. I also check online guides and community forums to see what others have done. This background research leads to a more efficient project experience and sets you up for success.
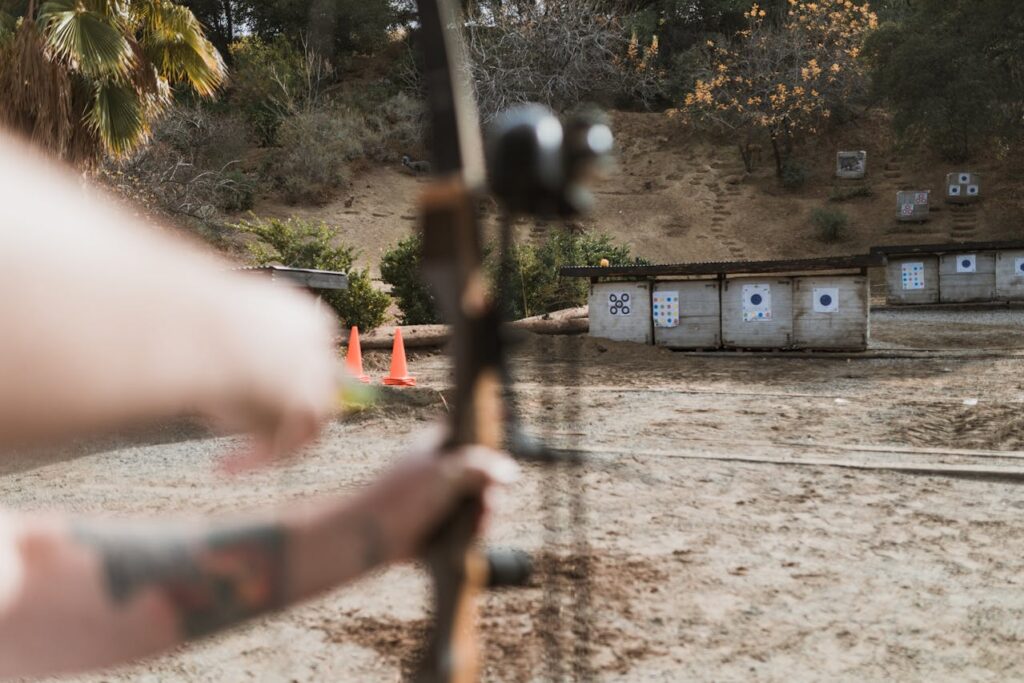
Quick Guide to Constructing Your Archery Target
Building an archery target can be straightforward if you follow a step-by-step approach. I have outlined some key steps to help you get your project off the ground:
- Choose your design and location: Decide whether the target will be stationary, free-standing, or hanging. Pick a safe and clear space for your target.
- Gather materials: Collect all the supplies you need such as wood, foam, layers of fabric, and protective coverings.
- Create the base structure: Cut the wood into the desired dimensions and assemble a frame that can support the weight of the other layers.
- Add impact layers: Attach foam or recycled materials inside the frame. These layers help to absorb the force of arrows hitting the target.
- Secure the outer casing: Cover the impact layers with burlap or another durable fabric. Secure the edges so that the layers stay in place during use.
- Test and adjust: Once assembled, try shooting a few arrows. Based on the impact and wear, make adjustments to improve safety and longevity.
This basic guide serves as a foundation. With practice and experimentation, you will find ways to improve the design and ensure the target stands up to regular use.
Things to Consider Before Building Your DIY Archery Target
Before starting any target project, I like to review several factors that can affect the outcome. This careful consideration helps me avoid common pitfalls and ensures safety and durability.
- Material Durability: I choose materials that can handle repeated impacts. Wood and foam combinations are popular because they offer both strength and shock absorption.
- Cost and Availability: I look for materials that are not only durable but also within my budget. Recycling old items or purchasing second-hand builds can be very practical.
- Weather and Environment: Outdoor targets face the elements. I make sure to consider weather-resistant coatings or designing a cover to protect my target in harsh weather.
- Safety Considerations: Every project needs a focus on safely covering the target face to prevent arrow penetration. I also design the support system to keep the target stable during use.
Material Durability
Durability is key when building a target that will face constant use. I prefer using recycled foam because it is forgiving on arrow tips. Wood frames can be sealed with a weatherproof finish to extend their lifespan, especially if the target is used outdoors.
Weather and Outdoor Use
If you plan to shoot outdoors, protecting your target from rain and sun is very important. I often apply a waterproof sealant on the wood. Additionally, constructing a removable cover ensures you can quickly protect the target during unexpected weather conditions.
Safety and Stability
Safety is always very important. A properly constructed target face helps slow the arrow and prevent penetration. A robust frame with a stable base minimizes movement when the target is hit. I always check that my design minimizes any hazards for both the shooter and bystanders.
Reviewing these factors before beginning your project can save time and improve the final product. Taking a little extra time upfront to plan results in a sturdier, safer target that performs well over time.
Advanced Design Tips and Creative Enhancements
Once you have mastered the basics, you may want to upgrade your design with some creative boosts. I have learned a few tricks that can make your DIY archery target both functional and pleasing to the eye.
Consider adding interchangeable layers to your target. This way, you can replace only the worn-out sections instead of rebuilding the entire target. I have experimented with a system where the front face comes in removable panels.
This addition also lets you modify the target based on different practice needs. For example, I sometimes use different density foams for practicing long-distance shots or for honing precision. Another idea is to incorporate design elements that make the target visually appealing.
Painting the frame with bright colors or experimenting with patterns can make the target a fun piece in your practice area. I use non-toxic paint that stands up to the weather. Sometimes adding a small, weather-resistant panel with score markings helps track progress during practice sessions.
Additional boosts include building a modular stand that allows you to move the target easily. A free-standing model can be arranged in various configurations, creating a multi-target setup. Such design features not only improve functionality but also add a touch of creativity to your archery space.
The Basics: Key Components for a Successful DIY Archery Target
Understanding the main components of a successful DIY archery target is integral to a project that works well over time. I have often focused on three key areas: the base structure, impact absorption layers, and outer protective covering.
The base structure is typically built with strong wood or sturdy metal. This part holds everything together. I ensure that the frame is robust enough to support the layers that absorb the arrow’s impact. An even and level base is essential. It not only helps maintain the target’s shape but also improves safety during use.
Next comes the impact absorption layer. Many DIY projects use layers of foam, old carpet, or specially designed rubber. This layer makes up most of the target’s damage-resistant quality. In my experience, adding multiple layers is more effective than using a single thick material. Each layer slows down the arrow gradually, reducing damage and extending the target’s useful life.
The outer protective layer is usually a tightly secured fabric or burlap. It guards the inner layers against weather and wear. A strong outer layer helps contain the other materials and provides a consistent surface for aiming. When these components work in harmony, the target takes hits more efficiently and lasts longer.
- Sturdy Base: A level and durable frame prevents the target from shifting unexpectedly.
- Multiple Impact Layers: Layers of foam or recycled materials absorb the force of arrows well.
- Protective Outer Cover: A fabric cover keeps the target safe from the elements and wear.
DIY Archery Targets Frequently Asked Questions
I often encounter common questions about building archery targets. Answering these questions can help clarify important aspects of the project.
Which materials are best for a beginner archery target?
I suggest starting with readily available materials like recycled foam, plywood for the frame, and burlap for the outer layer. These items offer a good balance between cost and functionality.
How can I protect my target from outdoor weather?
Using a weatherproof sealant on wooden parts and choosing weather-resistant fabrics for the outer layer can improve durability. I also recommend building a removable cover that can be used during harsh weather conditions.
Is it safe to use a DIY target for regular practice?
When built properly with multiple impact layers and a sturdy base, a DIY archery target can be very safe. I always stress the importance of regular maintenance and safety checks to ensure everything remains secure.
Can I customize the target to track scores or different practice levels?
Yes, I have added paint markings and interchangeable panels to track progress and adapt the target for various distances or arrow types. This customization makes practice sessions more engaging.
Maintenance and Care for Your Target
Keeping your DIY archery target in top shape is very important for longevity. Regular maintenance not only extends the life of your target but also helps ensure safety each time you use it. After several sessions of practice, take a few minutes to inspect the layers for any wear or damage.
Replace worn sections and re-secure any loose coverings. This routine will save you time and money in the long run and keep your target performing at its best. It is also smart to store your target properly when not in use, especially if you have built it outdoors.
Consider moving it to a sheltered area or covering it with a durable tarp. Such simple measures can shield your creation from seasonal changes and prolonged exposure to harsh weather. Furthermore, treating any wooden parts with a fresh coat of waterproof sealant once a year can make a huge difference in durability.
If you ever decide to modify your target—whether to update its appearance or to improve its functionality—take time to review what modifications were most effective. Documenting your changes in a small project journal could help you replicate success in future builds or share your ideas with other enthusiasts. Spending extra time to care for your target transforms it from a simple practice aid into a lasting centerpiece of your archery setup.
Final Thoughts on DIY Archery Targets
Creating a DIY archery target can be a very rewarding project. I enjoy the process of planning, gathering materials, and completing a project that step ups my practice space. Working on a target project not only improves your archery skills but also allows you to learn basic construction techniques and creative problem solving. Experiment with different materials, try out various designs, and do not be afraid to adjust things as you gain more experience.
Building your own target gives you the freedom to personalize every detail according to your needs. Whether you decide to create a simple target or a more advanced version with interchangeable panels and multiple layers, the sense of accomplishment when you complete the project is immense. Take your time to read, explore, and implement ideas that work best for you.
Over time, as you continue to refine your techniques, you will find that every improvement not only makes the target more resilient but also adds a layer of personal satisfaction to your archery practice. Sharing your project with friends or local community groups can also inspire others to kick things off on similar creative adventures.
Thank you for considering these DIY archery target ideas. I hope the suggestions and detailed steps help you in building a target that fits your practice routine perfectly. Enjoy the process, keep iterating, and experience the pride that comes with a project built by your own hands.
Check Out Our Latest Articles:
- Garmin GPS Devices: Navigational Must-Haves For DIY Hunting Expeditions

- Best Rooftop Tents For Overlanding

- Overlanding The Infamous Black Bear Pass In Colorado

- How To Pack A Lightweight Backpack For DIY Backpack Hunting Trips

- Navigating The Hunt Application Process In The US

- Kodiak Canvas Cabin Lodge Tent
As always, stay safe, enjoy the journey and please try to leave it cleaner than you found it. If you have any comments, questions, ideas, or suggestions please leave them in the comment section below and I’ll get back to you ASAP. You can follow us on YouTube: Man Art Creations for videos of our DIY Adventures.
P.S. – Thanks so much for checking out our blog we really appreciate it. Just so you know, we may receive a commission if you click on some of the links that appear on our site. This helps us keep our content free and up-to-date for everyone. We appreciate your support!
