Contents
- 1 Step 1: Assess Your Rifle and Scope Compatibility
- 2 Step 2: Prepare Your Workspace and Gather Tools
- 3 Step 3: Choose the Correct Mounting Hardware
- 4 Step 4: Align the Scope Mount Accurately
- 5 Step 5: Secure the Mounting Screws
- 6 Step 6: Test the Installation and Make Adjustments
- 7 Step 7: Monitor and Maintain Your Setup
- 8 Common Questions & Troubleshooting
- 9 Final Thoughts & Action Plan
I have spent many hours refining my skills in DIY projects. Installing a rifle scope mount is one area where careful planning, the right tools, and clear instructions make a real difference. A properly installed scope mount not only improves accuracy but also gives you peace of mind when you are out in the field.
QUICK LOOK: 7 Steps for Proper Scope Mount Installation
- Assess Scope and Rifle Compatibility: Take a moment to review your rifle and scope specifications and compare them to the mounting kit’s requirements. This early review sets the stage for a smooth installation without unexpected challenges.
- Prepare Your Workspace and Gather Your Tools: Clearing your work area minimizes distractions and lowers the risk of losing small parts during the process. Before you begin, lay out all necessary tools and supplies so that nothing interrupts your workflow.
- Choose the Proper Mounting Hardware: Choosing the proper mounting hardware is critical for the overall performance of your scope. Review the options available and select a mount that fits your specific rifle and scope combination.
- Proper Scope Mount Alignment: Accurate alignment is fundamental to achieving a successful installation. Even a slight misalignment can affect the point of impact and lead to parallax errors during shooting.
- Secure the Mounting Screws: Once the mount is properly aligned, it is time to secure it by tightening the mounting screws. This step requires a careful touch; screws that are too loose can allow movement during recoil, while screws that are overtightened may damage the threads or the rifle’s action.
- Test and Make Adjustments: Real-world testing is the best way to verify that everything is correctly aligned and firmly in place. By simulating actual use conditions, you can catch any issues that might not be visible during the initial installation process.
- Monitor and Maintain Setup: Regularly checking the screws and the alignment of your setup can help identify and fix any issues before they become serious. Regular monitoring and maintenance ensure that your setup remains as reliable as the day you installed it, giving you continued confidence during every shooting session.
In this guide, I share practical tips and advice for installing a rifle scope mount. Following these steps can help you secure a reliable setup that you can trust for years to come. This comprehensive guide covers everything from ensuring compatibility to regular maintenance, so you know exactly what to do every step of the way.
Step 1: Assess Your Rifle and Scope Compatibility
Before starting any installation, it is essential to check that your rifle and scope work well with the mounting hardware. A clear understanding of your equipment guarantees that your setup functions reliably when you need it most.
Knowing what fits and what does not can save time and prevent errors that might lead to wasted resources or further adjustments. Take a moment to review your rifle and scope specifications and compare them to the mounting kit’s requirements. This early review sets the stage for a smooth installation without unexpected challenges.
Questions to Ask Yourself:
- Does my rifle support the type of mount I plan to use?
- Is the scope designed for my rifle model?
- Do the mounting ring sizes match the scope tube diameter?
- Have I reviewed the manufacturer’s recommendations?
Example Goals for Compatibility:
- Ensure the scope produces a clear, crisp sight picture.
- Confirm that the mount holds the scope securely.
- Make sure the installation respects your rifle’s balance and handling.
Answering these questions puts you in an excellent position to move forward with the project. A solid match between your equipment helps reduce future adjustments and ensures a stable, accurate setup right from the start.
Step 2: Prepare Your Workspace and Gather Tools
A tidy, organized workspace is vital for a focused installation experience. Clearing your work area minimizes distractions and lowers the risk of losing small parts during the process. In addition, a clean environment helps protect the delicate components of your scope and mount from dust or debris that could later affect performance. Before you begin, lay out all necessary tools and supplies so that nothing interrupts your workflow.
Essential Tools and Supplies:
- A quality set of screwdrivers and hex wrenches
- A torque wrench for precise tightening
- Basic cleaning supplies, such as a brush and cloth
- The mounting kit specific to your rifle and scope
- Protective gloves and eyewear
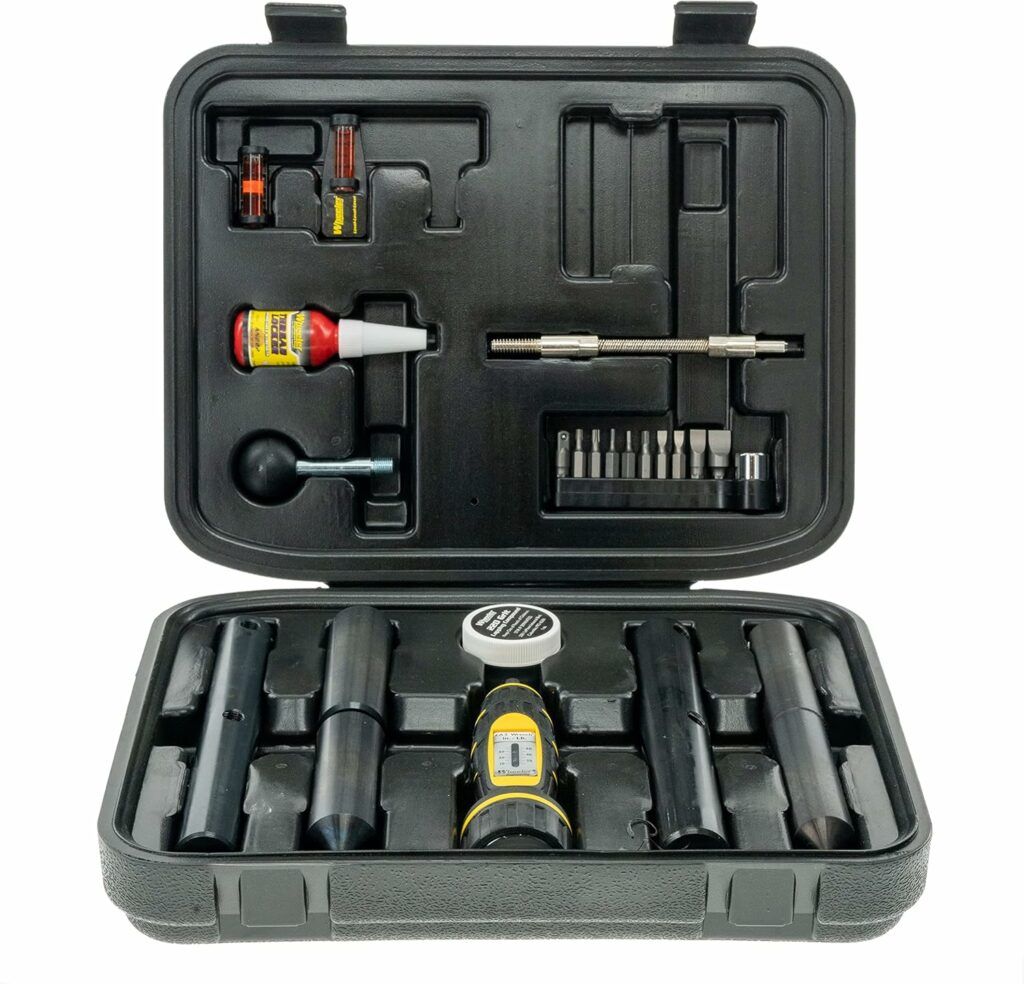
Having all these items at hand builds your confidence and makes each step smoother. This preparation not only saves time but also helps prevent mistakes that could arise from scrambling for tools mid-installation.
Step 3: Choose the Correct Mounting Hardware
Choosing the proper mounting hardware is critical for the overall performance of your scope. Review the options available and select a mount that fits your specific rifle and scope combination.
There are several types in the market, including one-piece mounts, two-piece mounts, and various configurations designed for different rail systems. Understanding the pros and cons of each option can simplify your decision-making process and ensure you pick hardware that meets your needs.
Things to Consider:
- Match the mount’s dimensions with your rifle’s design
- Consider how the weight of your scope is distributed
- Verify that the material is durable and corrosion-resistant
- Check user feedback to see how well the hardware performs in real situations
A well-chosen piece of hardware not only prevents issues like instability and misalignment but also makes the mounting process more straightforward. By taking a few extra minutes to research your options, you can save yourself much time and effort later.
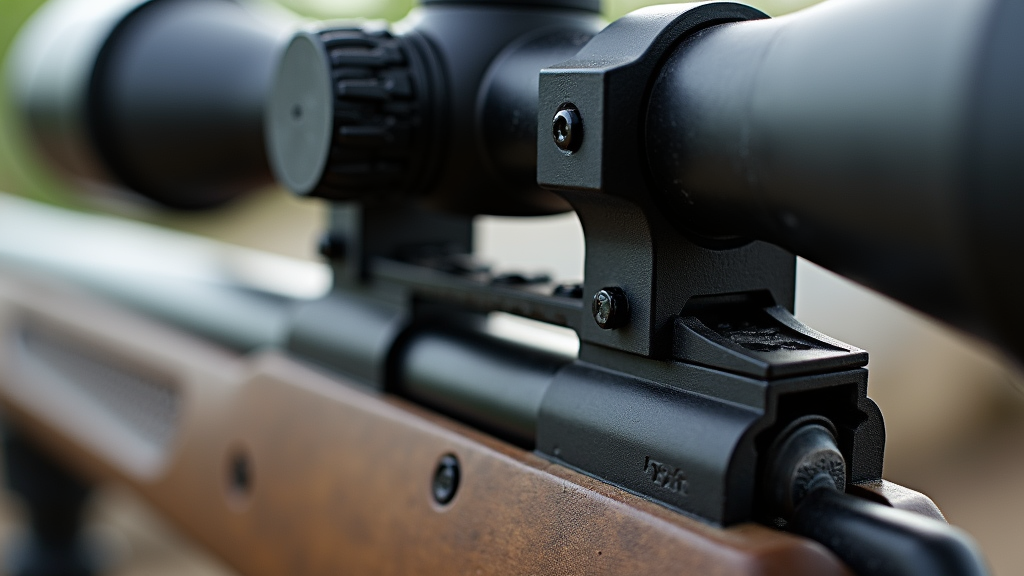
Step 4: Align the Scope Mount Accurately
Accurate alignment is fundamental to achieving a successful installation. Even a slight misalignment can affect the point of impact and lead to parallax errors during shooting. Spend time making sure that the mount sits perfectly straight along your rifle’s barrel, as this precision will pay off in improved accuracy and consistency once you’re on the range.
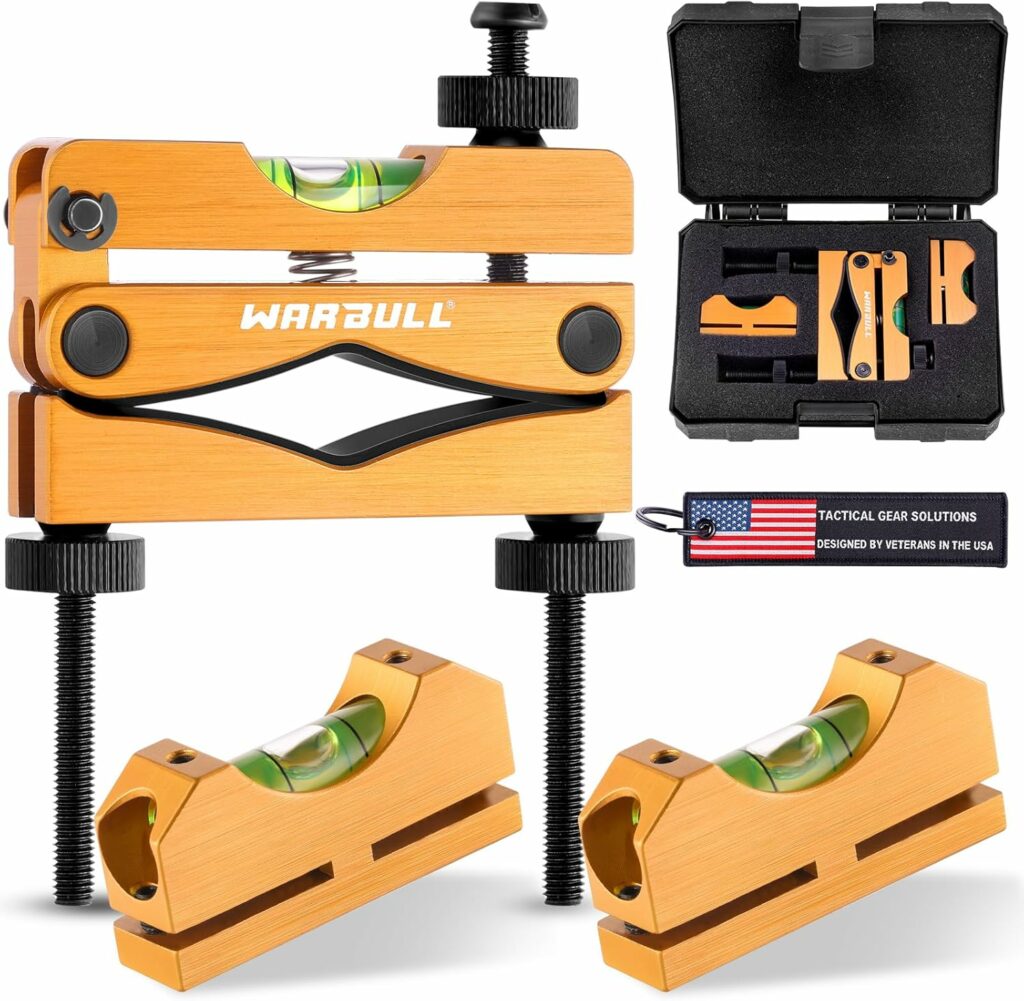
Steps for Proper Alignment:
- Place the mount on the rifle barrel and ensure the gaps on both sides are even.
- Use a level or alignment tool to check that the mount is perfectly straight.
- Confirm that the mounting surface is clean and free of any residue or debris.
Pro Tip:
Make small adjustments gradually until you lock in the perfect angle. Testing several times during this step can prevent any shifts later that might compromise your shooting accuracy.
Step 5: Secure the Mounting Screws
Once the mount is properly aligned, it is time to secure it by tightening the mounting screws. This step requires a careful touch; screws that are too loose can allow movement during recoil, while screws that are overtightened may damage the threads or the rifle’s action. Using a torque wrench makes it easier to apply the manufacturer’s recommended tightness and strike the right balance between security and safety.
Techniques for Securing Screws:
- Begin by fitting all screws loosely so you can make slight adjustments.
- Tighten the screws gradually in a cross pattern to evenly distribute pressure.
- Finally, use the torque wrench to achieve the specified tightness.
This measured approach ensures that your scope mount remains stable during recoil while avoiding any damage to the firearm. It is a critical step that should never be rushed.
Step 6: Test the Installation and Make Adjustments
After securing the mount, it is important to test the installation thoroughly. Real-world testing is the best way to verify that everything is correctly aligned and firmly in place. By simulating actual use conditions, you can catch any issues that might not be visible during the initial installation process.
How to Test Your Installation:
- Dry-fire your rifle to check that the scope does not move during operation.
- Place a target at a moderate distance to verify that the point of impact is consistent.
- If necessary, make small adjustments to correct any detected misalignment.
Thorough testing helps you pick up on vibrations, unusual noises, or slight movements. Addressing these issues immediately will ensure that your mount performs reliably in any condition.
Step 7: Monitor and Maintain Your Setup
Securing the mount is only the beginning—ongoing maintenance is equally important. Regularly checking the screws and the alignment of your setup can help identify and fix any issues before they become serious. Whether after a long day at the range or following a challenging field session, it pays to inspect your equipment.
Maintenance Tips:
- Inspect the mounting screws periodically for any signs of loosening.
- Clean the surfaces of both the mount and the scope to remove accumulated dirt.
- Store your rifle and scope in a controlled, safe environment when not in use.
- Retorque the screws as recommended by the manufacturer after heavy use.
Regular monitoring and maintenance ensure that your setup remains as reliable as the day you installed it, giving you continued confidence during every shooting session.
Common Questions & Troubleshooting
What should I do if the mounting screws do not tighten evenly?
If you notice that the screws are not tightening uniformly, try loosening them slightly and then re-tightening in a cross pattern. This method ensures that the pressure is distributed evenly across the mount.
How can I fix a misaligned scope mount?
For minor misalignments, loosen the screws and adjust the mount carefully. Once you are satisfied with the realignment, secure the screws again using a torque wrench. If the problem persists, consult the mounting kit instructions or seek advice from experienced shooters.
Can I install a scope mount without special tools?
It is possible to complete the installation with basic tools, but using a torque wrench and proper alignment instruments greatly improves accuracy and efficiency. Investing in the right tools can help you avoid errors and ensure a reliable mount every time.
Final Thoughts & Action Plan
Installing a rifle scope mount requires patience, precision, and careful planning. A secure mount not only improves the performance of your scope but also boosts your confidence every time you aim and shoot.
By following a systematic process—from checking compatibility and preparing your workspace to alignment, securing, testing, and regular maintenance—you set the stage for success. Each step in this guide is designed to help you achieve a stable, accurate, and long-lasting installation.
Your Action Plan:
- Review your rifle and scope manuals to confirm compatibility.
- Gather all necessary tools and set up a clean, organized workspace.
- Select high-quality mounting hardware that meets your specific requirements.
- Align the mount precisely and secure the screws using a torque wrench.
- Test the installation under varying conditions and make adjustments if needed.
- Schedule regular maintenance checks to keep your setup reliable.
Investing time and effort during the installation process can make a significant difference in your shooting experience. A carefully installed scope mount ensures that you spend less time troubleshooting and more time enjoying your sport.
What is one tip or trick you think could further improve this process? Your insights might be just the piece of advice someone else needs. Remember that safety and precision go hand in hand, so always follow manufacturer guidelines and trust your preparation.
Check Out Our Latest Articles:
- Vortex Optics Essentials: Hunting Scope Guide For The Serious Outdoorsman

- Garmin GPS Devices: Navigational Must-Haves For DIY Hunting Expeditions

- Best Rooftop Tents For Overlanding

- Overlanding The Infamous Black Bear Pass In Colorado

- How To Pack A Lightweight Backpack For DIY Backpack Hunting Trips

- Navigating The Hunt Application Process In The US

As always, stay safe, enjoy the journey and please try to leave it cleaner than you found it. If you have any comments, questions, ideas, or suggestions please leave them in the comment section below and I’ll get back to you ASAP. You can follow us on YouTube: Man Art Creations for videos of our DIY Adventures.
P.S. – Thanks so much for checking out our blog we really appreciate it. Just so you know, we may receive a commission if you click on some of the links that appear on our site. This helps us keep our content free and up-to-date for everyone. We appreciate your support!

