Contents
Field dressing and quartering a deer is a truly important skill for anyone who hunts and wants to put their own meat on the table. Taking care of the animal right in the field makes a major difference when it comes to how the meat tastes and how long it lasts.
The first time I dressed a deer myself, I was pretty nervous, but with a little prep and some step-by-step know-how, it turned out to be quite doable. Once you actually go through the steps, you’ll find it’s more about care and respect than difficulty.
This guide breaks down how to field dress and quarter a deer, based on what works for me and what I’ve learned from other experienced hunters. Always check your state’s regulations before heading out, and make sure your license is current. Proper field care isn’t just about following the rules; it’s about respecting your harvest and getting tasty, top-quality meat onto your plate.
Getting Ready: What You Need and Preparation
Before starting, I get my gear lined up and set up a clean workspace. Having the right tools ready saves time, reduces stress, and keeps things safe and clean as you work.
My Go-To Field Dressing Tools:
- Sharp knife (I favor a droppoint or gut hook knife)
- Latex or rubber gloves for safety and hygiene
- Game bags for protecting the meat
- Rope suitable for hanging the deer
- Small saw or bone saw for quartering
I keep everything tidy in my hunting pack to avoid scrambling when it’s go-time. Cleanliness is super important, so having paper towels and hand sanitizer can make all the difference out there.
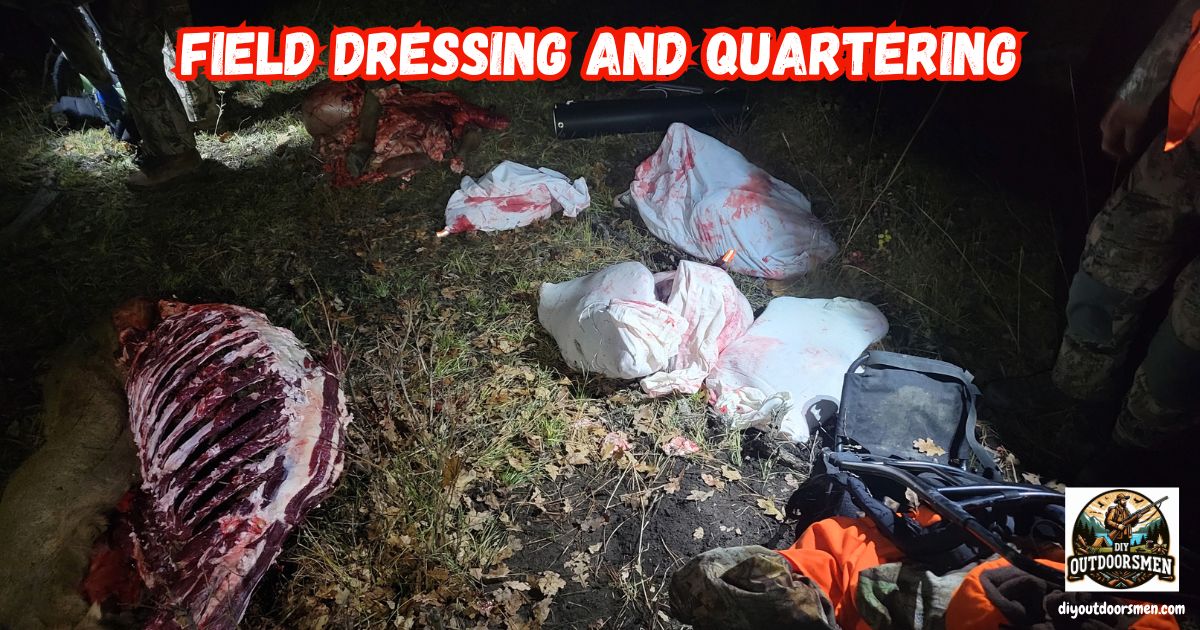
Step 1: Field Dressing the Deer
The main goal with field dressing is to remove the internal organs as soon as possible and cool the meat quickly. This keeps everything fresh and at its best.
How I Position the Deer and Make the First Cuts
- Lay the deer on its back, stretching the legs apart to get to the belly. If you can, have the head downhill to help fluids drain away naturally.
- Put on gloves to help keep things sanitary. Start by removing the genitals or udder, depending on whether it’s a buck or a doe.
- Use your knife to gently cut around the anus and rectum, releasing it from the tissue, but leave it in place for now.
Opening the Body Cavity
- Right below the breastbone (sternum), pinch the skin and lift it with two fingers. Make a shallow cut through the belly with the knife pointing upward and use gentle, slow movements so you don’t accidentally cut the intestines or stomach.
- Continue the cut straight down the belly all the way to the pelvis, making a single clean opening.
Removing the Entrails
- Once the body cavity is open, reach in toward the chest cavity and carefully cut the diaphragm. The diaphragm is a thin muscle layer that separates the chest from the stomach.
- Next, grip the windpipe and esophagus at the base of the neck, cutting them free. You can now pull downward, and the abdominal organs will begin to let go easily.
- Slowly pull the entrails out the rear end of the deer, using your knife as needed to free up any tissue that’s holding everything in place.
- The rectum will come out with everything else. Cut any last connective tissue as needed so the organs come out together in one move.
Finishing Touches
- Drain out as much blood as possible by tilting the deer. Prop the cavity open with a stick or branch to keep air circulating, which speeds up the cooling process. Fast cooling is critical to keeping the meat fresh, especially if it’s warm outside.
Step 2: Skinning and Quartering the Deer
Once you’ve dressed the deer, it’s time to skin and quarter it for easier transport and processing. The process is much faster and smoother if the body is still warm.
How I Hang and Skin the Deer
- I usually hang the deer by its hind legs from a sturdy tree limb or gambrel using rope. Cut the hock tendons on each hind leg for hanging.
- While it’s hanging, I cut a ring just above each hind leg knee, making sure not to cut into the meat beneath.
- Slice from each leg ring down to the pelvis, joining them along the inside of the thighs so you can peel back the skin.
- I repeat the process for the front legs, cutting around each foreleg and slicing from the ankle toward the chest.
- Grip the skin with one hand and steadily pull it down, using the tip of the knife to free hairy spots that cling to fat or muscle underneath. Pulling is usually better than overusing the knife when the deer is still warm.
Quartering the Meat
- Hindquarters: To take off a hindquarter, slice between the hip and pelvis joint and carefully work around the ball-and-socket joint with your knife’s tip, freeing the muscle until the leg separates from the body.
- Front Shoulders: Shoulders are just attached by muscle; there’s no socket. Make a few cuts along the shoulder blade and ribs, and you can easily remove the whole front leg.
- Backstraps and Tenderloins: Slice on either side of the spine from shoulders to hips. Work slowly to keep the backstraps intact, using careful cuts. For tenderloins, reach inside the abdominal cavity and gently pull them away from under the backbone.
Protecting the Harvest
- Place each quarter and other boneless meat in game bags right away. This keeps it clean and safe from dirt, flies, or anything else that could cause spoilage.
Step 3: Transporting and Cooling the Meat
After your deer’s quartered and bagged, you need to focus on cooling the meat, which will matter for taste and safety.
- If you’re close to your vehicle, keep the quarters insulated but not sealed tight. Ice in coolers and using game bags help the meat stay chilly without getting soggy.
- If it’s cold outside, meat can rest in a shady spot for a short while. Never leave it in direct sunlight as it can spoil much faster.
- On a longer hike out, like a backcountry trip, hang your quarters in a mesh bag so air circulates well until you’re ready to head home.
Step 4: Butchering and Processing at Home
Once you’re back at home, set up a sturdy surface and have several sharp knives on hand. Set aside enough time to carefully finish breaking down the meat.
- Take each quarter, debone as needed, and trim off any tough connective tissue, fat, or bruised areas.
- Portion the meat into roasts, steaks, or chunks for grinding. This makes storage and meal prep much more manageable later.
- Finish by wrapping or vacuum-sealing all the pieces. Make sure to label every package with the date and the specific cut for quick planning at dinnertime.
Common Questions and Tips
What if I don’t have a place to hang a deer?
If you don’t have access to a tree or a gambrel, lay your deer out on a clean tarp and skin one half at a time, gently flipping it to avoid messing up the meat.
Do I need a bone saw for quartering?
You won’t need one most of the time. Joints can usually be separated cleanly with a sharp knife. A saw helps only if you want to cut the pelvis or split the rib cage nice and clean.
How soon do I need to start field dressing?
Start as quickly as you can. Heat makes it crucial to act fast to avoid meat spoilage. Even on cold days, I try to begin within twenty to thirty minutes for the best results.
Next Steps and My Advice
Getting the hang of field dressing and quartering is all about learning it step by step. The task will get easier and smoother every time you do it. Always double-check your local laws, prep your knives the night before, and have gear prepped and easy to grab. With each hunt, comfort and confidence in the field will build, leading to more pride in your harvest and better meals in your kitchen.
Your Field Care Checklist:
- Pack core essentials: a sharp knife, gloves, strong rope, and bags.
- Dress and cool your deer quickly after the harvest.
- Skin and quarter for smoother transport and cleaner meat.
- Stay neat and organized from start to finish to protect your efforts and your food.
Each year brings a new lesson about field care. The more careful and organized you are, the more rewarding your meals will end up being. It’s one of the most satisfying parts of the hunt—everything you do to look after your deer in the field pays off big time at the dinner table.
Most Recent Articles:
- Best Rooftop Tents For Overlanding

- Overlanding The Infamous Black Bear Pass In Colorado

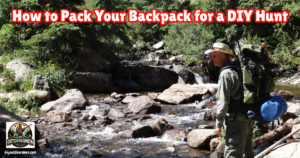
- How To Pack A Lightweight Backpack For DIY Backpack Hunting Trips
- Navigating The Hunt Application Process In The US

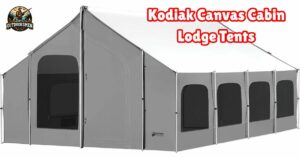
- Kodiak Canvas Cabin Lodge Tent
- Safety Tips For Hiking In Bear Country

As always, stay safe, enjoy the journey, and please try to leave it cleaner than you found it. If you have any comments, questions, ideas, or suggestions, please leave them in the comment section below, and I’ll get back to you ASAP. You can follow us on YouTube: Man Art Creations for videos of our DIY Adventures.
P.S. Thanks so much for checking out our blog; we really appreciate it. Just so you know, we may receive a commission if you click on some of the links that appear on our site. This helps us keep our content free and up-to-date for everyone. We appreciate your support!

