
Contents
- 1 Core Tools for Offline Navigation
- 2 How I Use a Map and Compass on Backcountry Trails
- 3 Getting the Most Out of Offline Smartphone Apps
- 4 Natural Navigation Techniques and Reading the Landscape
- 5 Frequently Asked Questions about Navigating without a GPS Signal
- 6 Prep Steps Before Starting a Backcountry Hike
- 7 Staying Calm and Safe When I Feel Lost
- 8 Practical Tips for First-Time Offline Navigators
- 9 Offline Navigation in Real-World Scenarios
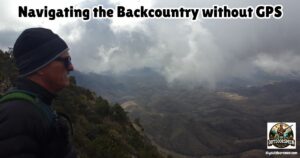
Finding my way through backcountry trails without a GPS signal can feel intimidating at first, but it’s completely possible with practice and the right techniques. Electronic devices can help, but I need practical skills to stay safe and on track when technology is unreliable. This guide shares how I handle off-grid navigation and gives tips for anyone ready to build confidence exploring wild places with just analog tools and their senses.
- Practice at Home: Navigating by map and compass is a hands-on skill. I recommend practicing short hikes in local parks before going deep into the wilderness.
- Keep Gear Secure and Accessible: I keep my compass on a lanyard and my map in a sealable bag in an outside pocket for quick access. Stowing tools at the bottom of my pack just leads to frustration and less frequent checks.
- Check Landmarks Regularly: Every 10 or 20 minutes, I check my surroundings, compare them with the map, and mark my position. This habit keeps me from wandering off the trail for long stretches.
- Don’t Rely Solely on Other Hikers: I trust my own skills and tools rather than blindly following someone who claims to be heading the right way.
Whenever I head out into the backcountry, carrying proper navigation tools becomes one of the steps I never skip. Cell service is unreliable, but my sense of direction doesn’t need to depend on a phone. I rely on a combination of analog gear and preloaded offline maps to keep myself oriented.
For paper, a waterproof topographic map of the area gives me the clearest overall picture. I add a trusty magnetic compass, which never runs out of battery and gives me a clear sense of direction in any terrain. Even if I bring a GPS device or smartphone, I always make sure I’ve downloaded the area’s maps in advance using apps like Gaia GPS, AllTrails, or Topo Maps+.
Smartphones use satellite GPS signal, so my location dot can still show up without a cellular signal, as long as the maps are saved on the device. When my battery is running low, or a device fails, or I lose satellite signal, I know I’m never stuck as long as I’ve practiced reading a map and compass before heading out.
How I Use a Map and Compass on Backcountry Trails
I always start by orienting my map with the terrain around me. To do this, I line up the map’s north with actual north. I can confirm that with my compass. Holding the compass on the map’s edge, I spin the whole map and compass together until the red compass needle points to north on the page. This makes the features I see match what’s on paper.
When picking my route, I follow trails on the map and identify big landmarks: peaks, ridges, streams, or lakes. I note the elevation gain and major junctions. While walking, I use a method known as “thumbing” the map. I keep my thumb or a small marker on my current position, moving it forward as I hit junctions or pass unique features.
- Bearing Navigation: I use my compass to follow a specific direction or bearing. Let’s say I need to head northwest; I set the compass dial to that bearing, hold the compass steady, and pick a spot in the landscape (like a tree or a large rock) that matches the right direction. I walk to it, then repeat; this keeps me from drifting far off my intended line.
Getting the Most Out of Offline Smartphone Apps
While I’d never leave home depending only on my phone, apps like Gaia GPS or AllTrails help me a ton. Before leaving, I download the maps for every section I plan to cover. The phone’s GPS chip works even without Wi-Fi or cell coverage, which means I can check my location against the preloaded map as long as the phone is on and charged.
In airplane mode, my phone’s battery lasts much longer, and offline maps load instantly. Having a location visible (the “blue dot”) is useful at tricky trail intersections or when finding the fastest way around an obstacle.
Even if my phone dies or I lose satellite GPS signal, I always have my paper map and compass as my main backup plan.
If all tools fail, and I can’t get a GPS signal, I switch to using my eyes and environmental clues. Natural navigation is slower, but these skills give me a reliable way to keep oriented:
- Landmarks: I pick out mountains, ridges, or streams that can’t be missed, matching them with features on my map. This habit keeps my location clear and reduces the chance I’ll get lost after a break or if the trail gets hard to see.
- Handrails: I look for “handrails” in the landscape, like a stream, canyon, fenceline, or ridgeline. Following these makes it much harder to get lost.
- Sun and Shadows: In the northern hemisphere, the sun is due south at midday. Watching the movement of shadows helps me keep track of my direction during the day. For a quick check, I stick a stick in the ground, mark the tip of the shadow, wait 10 or 15 minutes, and then mark the new tip. A line drawn between these marks points roughly east-west.
- Trail Markers: On some trails, stacked rock cairns, painted blazes on trees, or signposts mark the way. I always pay attention when these appear, especially in wide open spaces where the trail can fade out.
- Vegetation: Sometimes, noticing which side of trees is covered in moss or lichen gives weak clues about direction. Moss usually prefers the damper, shadier northern side of trees in the northern hemisphere. This method is not as reliable as others, so I use it just to double-check my primary navigation choices.
By combining natural cues with a map and compass, I develop a more flexible sense of direction until I regain my position or return to a known landmark.
Can I use my phone’s GPS without a signal?
Yes, as long as the maps are downloaded ahead of time, the blue dot (location) keeps working because smartphones use GPS satellites, not the cell network, to determine location. As long as you can get a satellite GPS signal, you can use your phone’s GPS to navigate.
How do I “thumb” the map properly?
As I walk, I hold the map so my thumb covers where I am on the map. When I reach a landmark or junction, I slide my thumb forward. This keeps my exact position clear and saves time hunting for my place after breaks.
What if the weather changes quickly?
I pack an extra layer and know at least one safe exit route from the area. Sudden storms or fog can make map and compass navigation more challenging, so preparation pays off.
Yes, if I bring a device like Garmin InReach, it lets me share my position with others and sometimes download updated maps or weather reports. I still carry paper backups in case batteries run out or I can’t get a satellite GPS signal.
Prep Steps Before Starting a Backcountry Hike
Preparation is one of the most important things I do before heading out. I check out recent trip reports online, print or load updated trail maps, and check for any new hazards, closures, or reroutes. If possible, I share my plan with someone I trust and explain what time I expect to return. Leaving a note in my car about my route can help rescuers if something goes wrong.
- Charge Devices: I make sure all devices are fully charged and pack a lightweight battery bank or extra batteries for backup.
- Bring Layers and Food: If I might end up out longer than planned, I pack warm clothing, rain gear, water, and extra snacks.
- Record Trailheads and Waypoints: I write down trailhead coordinates and key waypoints, both on paper and in my phone, so I can reorient myself if navigation becomes tricky.
Staying Calm and Safe When I Feel Lost
If I realize I’m not sure where I am, I stop right away to avoid making things worse. I use the S.T.O.P. method, which stands for:
- Stop: I take a breath and pause all movement to avoid getting more lost.
- Think: I try to remember the last landmark or junction where I was completely sure of my position. I use my map and compass to backtrack in my head.
- Observe: I look and listen for clues; streams, large rocks, or trail markers.
- Plan: With this information, I make a sensible choice. Most of the time, the safest thing is to stay put, so I’m easier to find. If possible, and I know it’s nearby, I follow handrails like a creek or ridge back toward a known location.
Having practiced these scenarios ahead of time, I feel a bit less anxious when things get confusing. Keeping a calm head really pays off.
Having spent many days exploring places without service, I’ve collected some personal tips that help everything go a little smoother:
- Practice at Home: Navigating by map and compass is a hands-on skill. I recommend practicing short hikes in local parks before going deep into the wilderness.
- Keep Gear Secure and Accessible: I keep my compass on a lanyard and my map in a sealable bag in an outside pocket for quick access. Stowing tools at the bottom of my pack just leads to frustration and less frequent checks.
- Check Landmarks Regularly: Every 10 or 20 minutes, I check my surroundings, compare them with the map, and mark my position. This habit keeps me from wandering off the trail for long stretches.
- Don’t Rely Solely on Other Hikers: I trust my own skills and tools rather than blindly following someone who claims to be heading the right way.
Most of my favorite moments on the trail happen away from crowds or clear markers. When hiking remote ridges, I find that following the natural line of the hilltop and using prominent summits as checkpoints makes staying found much easier, even when the trail disappears.
Roll over landscape features, like saddles or valleys, help me judge my elevation by comparing it with contour lines on my topo map. An example is when I once hiked a section where the trail vanished into snow. By checking the map, compass, and my altitude, I identified my correct direction and avoided wandering down the wrong drainage.
- Mountainous Areas: Prominent peaks and ridges make orienting my map straightforward. I use contour lines to keep from dropping too low or scrambling too high.
- Desert or Forest: Navigation can become trickier. Repeating a look-back routine, marking waypoints, and making use of sun and shadow become my main tools.
In less populated wilderness, awareness is key. Keeping an eye out for changing landmarks along the way helps forestall problems. Pausing regularly, even when things feel straightforward, is important to prevent small errors from compounding.
Packing a small notebook to jot down key features or turns also pays off if I have to retrace my steps—writing down details is much easier to reference than relying on memory alone. Remember, for centuries, people navigated the wilderness without a GPS signal. You can do it too.
Most Recent Articles:
- Without a GPS Signal How do You Navigate Backcountry Trails?
- Vortex Optics Essentials: Hunting Scope Guide For The Serious Outdoorsman

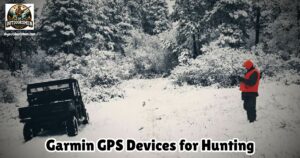
- Garmin GPS Devices: Navigational Must-Haves For DIY Hunting Expeditions
- Best Rooftop Tents For Overlanding

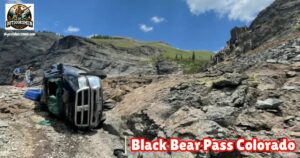
- Overlanding The Infamous Black Bear Pass In Colorado
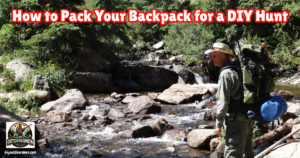
- How To Pack A Lightweight Backpack For DIY Backpack Hunting Trips
As always, stay safe, enjoy the journey, and please try to leave it cleaner than you found it. If you have any comments, questions, ideas, or suggestions, please leave them in the comment section below, and I’ll get back to you ASAP. You can follow us on YouTube: Man Art Creations for videos of our DIY Adventures.
P.S. Thanks so much for checking out our blog; we really appreciate it. Just so you know, we may receive a commission if you click on some of the links that appear on our site. This helps us keep our content free and up-to-date for everyone. We appreciate your support!

