Contents
- 1 How to Begin Planning Your First Backpacking Trip
- 2 Researching Trail Conditions and Safety Factors
- 3 Choosing the Right Backpacking Gear
- 4 Planning Food and Water Needs for Backpacking
- 5 Making and Using Navigational Resources
- 6 Preparing Physically and Building Skills
- 7 Final Systems Check Before Hitting the Trail
- 8 Extra Tips for First-Time Backpackers
- 9 Frequently Asked Questions
- 10 Final Thoughts on Planning a Backpack Trip
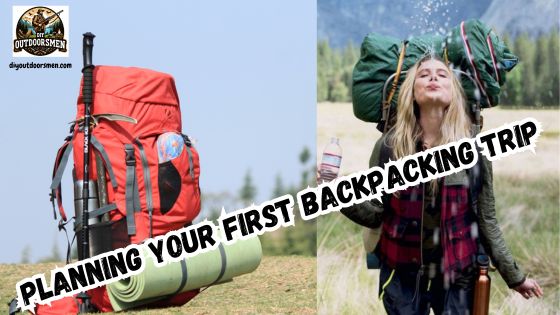
Backpacking for the first time feels both exciting and a bit scary. My first trip showed me that a little planning goes a long way in making the adventure much more enjoyable and stress-free. From scouting a destination to double-checking my gear for the trail, every detail mattered. I’m sharing this guide to help you feel confident, ready, and pumped for your own adventure.
QUICK LOOK: Beginner’s Guide for Planning a Backpacking Trip
- Choosing a Location: I pick a trail or area by checking its scenery, how tough the terrain is, and how easy it is to get there. If it’s my first time, I go for well-marked and popular trails—less stress, more fun.
- Timing: I look into weather trends for the season. Summer seems lovely, but bugs, heat, or crowds can make spring or fall a better bet. The time of year sets the vibe.
- Travel Companions: Going solo gives flexibility, but teaming up with a friend can add safety and fun, especially on a first outing.
- Trip Goals: Clocking big miles versus chilling by the campfire under the stars—different goals shape the entire plan.
- Duration: Keeping it to one or two nights is a good move for starting out. Shorter days help you adjust to carrying more weight.
- Proper Gear: The right gear sets the stage for all situations. I keep my load as light as I can, but never skip the must-haves.
- Food and Water: Camp meals are a highlight after hiking. For early trips, I chose lightweight prepackaged, high-calorie options that held up in my bag. Depending on the hike, I budget 2,500 to 4,500 calories for each day.
- Navigation Tools: Getting off trail is easier than you’d think, even with good blazes. Planning routes in advance and bringing reliable navigation gear keeps me locked onto the trail while backpacking.
- Prepare Physically: Regular hikes build my base fitness. Weeks before the trip, I slowly increase the weight in my backpack until it matches what I’ll carry on the journey.
- Have a Backup Plan: Having a “what if” for weather or injuries makes me feel more at ease knowing I’m ready to adjust course.
How to Begin Planning Your First Backpacking Trip
Nailing down the details upfront is key. I start with the basics: where I want to go, when, and who’s coming with me. It also helps to get clear about what I want from a backpacking trip—maybe time in nature, a little challenge, or picking up new skills. The number of nights out impacts everything from food to gear to the route.
- Choosing a Location: I pick a trail or area by checking its scenery, how tough the terrain is, and how easy it is to get there. If it’s my first time, I go for well-marked and popular trails—less stress, more fun.
- Timing: I look into weather trends for the season. Summer seems lovely, but bugs, heat, or crowds can make spring or fall a better bet. The time of year sets the vibe.
- Travel Companions: Going solo gives flexibility, but teaming up with a friend can add safety and fun, especially on a first outing.
- Trip Goals: Clocking big miles versus chilling by the campfire under the stars—different goals shape the entire plan.
- Duration: Keeping it to one or two nights is a good move for starting out. Shorter days help you adjust to carrying more weight.
Researching Trail Conditions and Safety Factors
Looking into trail conditions helps dodge headaches. Before setting out, I jump into trail reports, local guides, and park websites for the latest scoop. Knowing what’s happening out there—like a washed-out bridge or recent bear sightings—can save you stress on the trail.
- Weather: Always check the forecast for your precise location and elevation, not just the nearest town. Mountain weather is notorious for switching up, so pack extra layers just in case.
- Trail Hazards: Steep dropoffs, deep stream crossings, or overgrown paths are good to know about. I get into recent trip reports to avoid surprises.
- Wildlife: If there are bears, I plan for a bear canister. Ticks or snakes? I wear proper clothes and stay on top of things.
- Regulations and Permits: Most parks or backcountry areas set their own rules. I check for permits, daily quotas, and make bookings as far ahead as possible.
Choosing the Right Backpacking Gear
The right gear sets the stage for all situations. I keep my load as light as I can, but never skip the must-haves.
- Shelter: Tent, tarp, or bivy—the choice depends on the weather, season, and mood. I stick with a lightweight tent and solid rainfly for most trips, which keeps things dry and bug-free.
- Sleep System: My sleep bag matches the coldest temps I might run into, and an insulated pad pumps up comfort and warmth.
- Backpack: A fitted pack makes even long days tolerable. It’s worth trying out a couple for the best feel and fit.
- Navigation: Phones and GPS are awesome, but a paper map and compass are my backup. When batteries quit, maps keep working.
- Sun, Bug, and First Aid Protection: Sunscreen, hat, sunglasses, bug spray, and a simple first-aid kit are always on my list. Moleskin for blisters is a blessing.
- Clothing: I pack layers: a moisture-wicking base, a warm middle (like fleece), and a waterproof shell. Cotton is out; it dries too slowly.
- Footwear: I use sturdy trail runners or hiking boots. Breaking them in before the trip is a must, and extra socks help a lot.
Planning Food and Water Needs for Backpacking
Camp meals are a highlight after hiking. For early trips, I chose lightweight prepackaged, high-calorie options that held up in my bag. Depending on the hike, I budget 2,500 to 4,500 calories for each day. Tasty food brings a boost after a long trek.
- Food: Instant oatmeal, ramen packs, freeze-dried meals, nut butters, and trail mix are my easy go-tos. Testing meals at home first is smart—taste buds are picky when you’re tired.
- Water: I carry at least a couple of liters between refill points and scout out water sources ahead of time. Clean water is gold when you’re out there.
- Water Purification: I like using a tiny water filter or chemical tablets. It just takes minutes, and it keeps me healthy in remote spots.
Getting off trail is easier than you’d think, even with good blazes. Planning routes in advance and bringing reliable navigation gear keeps me locked onto the trail while backpacking.
- Maps: Topographic maps show the highs and lows—literally. Up-to-date printouts (CalTopo is great) keep me on track, even where cell service fades.
- Compass and GPS: Phone apps are cool most days, but a trusty compass never needs a charge. I practice a bit at home before each trip.
- Route Planning: Matching daily distance with my fitness and where water and campsites are keeps the trip doable. Setting a realistic goal makes for happy hiking.
Preparing Physically and Building Skills
Prepping for backpacking is more than ticking items off a checklist. Regular hikes build my base fitness. Weeks before the trip, I slowly increase the weight in my backpack until it matches what I’ll carry on the journey.
- Endurance Training: Short climbs, hills, even uneven sidewalks—every bit adds up. Practice hikes help me spot problem gear before I’m out for good.
- Navigation Practice: I brush up on using my map and GPS before each trip. Getting familiar with taking bearings and reading terrain keeps me calm if things get confusing.
- Leave No Trace Principles: I always stick with Leave No Trace: pack out trash, camp far from water, and leave nature untouched. Using these principles helps protect all the wild places I love.
Final Systems Check Before Hitting the Trail
A week ahead, I do a full gear shakedown and triple-check my plans—it helps cut last-minute panic. My list for this crucial runthrough includes:
- Gear Check: Laying out everything and testing older equipment. I make sure my stove lights, rain gear is solid, and batteries are fresh.
- Permits and Reservations: For parks or remote sections, I print or save everything I need. Confirmations are peace of mind.
- Transportation and Logistics: Arranging a shuttle, parking, or a backup plan for getting to and from the trail. It makes the start and finish run smoothly.
- Leave My Itinerary: I always hand off my route and estimated return time to someone back home. This simple move adds a safety net.
Extra Tips for First-Time Backpackers
The basics are a strong foundation, but these bonus tips made my first trip much smoother:
- Packing Light: It’s so tempting to overpack. I question the need for each item and cut extras. A lighter pack can save your back and feet.
- Test Runs: Trying my gear on a close-to-home overnight gives me a feel for comfort and catches missing items before the big trip.
- Pacing: Starting at a relaxed pace keeps my energy up for later days. Frequent rest breaks help, and I listen to what my body needs.
- Backup Plans: Having a “what if” for weather or injuries makes me feel more at ease knowing I’m ready to adjust course.
Frequently Asked Questions
Folks new to backpacking often want answers to these questions:
How many miles should I plan for each day?
For first trips, aim low—5 to 8 miles per day. This eases you in and lets your body adapt to the weight and terrain.
Do I need to bring a tent, or can I use a hammock?
Tents provide better protection and privacy, especially if the weather turns. Hammocks are lighter, but only good with the right trees and dry conditions.
How do I keep food safe from animals?
I stash all my food in a bear canister or hang it—whatever the park rules say. Always check regulations first.
Is it okay to hike alone?
Lots of people hike solo, but for new trekkers, stick with well-marked trails that have cell service. Always share your trip info with someone you trust.
Final Thoughts on Planning a Backpack Trip
A successful first backpacking adventure relies on solid prep, the right gear, and a strong focus on safety. Start small, tweak your routine with each trip, and enjoy the way every experience brings a little more confidence for next time. The adventure is yours—time to roll!
As always, stay safe, enjoy the journey, and please try to leave it cleaner than you found it. If you have any comments, questions, ideas, or suggestions, please leave them in the comment section below, and I’ll get back to you ASAP. You can follow us on YouTube: Man Art Creations for videos of our DIY Adventures.
Most Recent Articles:
- DIY Hunting Requires Expensive High-end Gear Myth Debunked
- Reviewing Compact Rangefinders For Precision In DIY Hunting

- Common Misconception: DIY Hunting Is Only For Experienced Pros

- How To Choose The Right Handheld GPS Device For Solo Hunting

- Smartphone-integrated GPS Mapping For Hunting And Hiking
- Modular Backpack Tree Stands For Hunting
P.S. Thanks so much for checking out our blog; we really appreciate it. Just so you know, we may receive a commission if you click on some of the links that appear on our site. This helps us keep our content free and up-to-date for everyone. We appreciate your support!

