Contents
- 1 Understanding Wild Game Meat Preservation
- 2 How Vacuum Sealing Works
- 3 Step-by-Step Tips for Vacuum Sealing Wild Game
- 4 Comparing Vacuum Sealing to Other Methods
- 5 Benefits of Vacuum Sealing Wild Game
- 6 Potential Downsides and Considerations
- 7 Real-World Uses: My Experience with Vacuum Sealing
- 8 Frequently Asked Questions
- 9 Final Thoughts on Choosing the Best Wild Game Storage Method
Preserving wild game meat after a hunt is important for anyone wanting to make the most of their harvest. Vacuum sealing has become a popular way to store meat, but I’ve been asked plenty of times if it’s truly the best option out there.
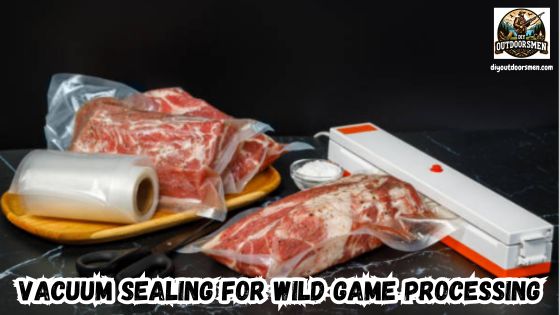
QUICK LOOK: Tips for Vacuum Sealing Wild Game
- Prepare the Meat: Clean off any hair, dirt, or blood, then dry the meat thoroughly with a paper towel. This step is crucial because any extra moisture will be drawn out during sealing and could weaken the seal.
- Cut to Size: Decide on the portion sizes you want and trim everything before sealing. This helps avoid trapping air pockets between strangely shaped pieces and makes meal prep much easier later on.
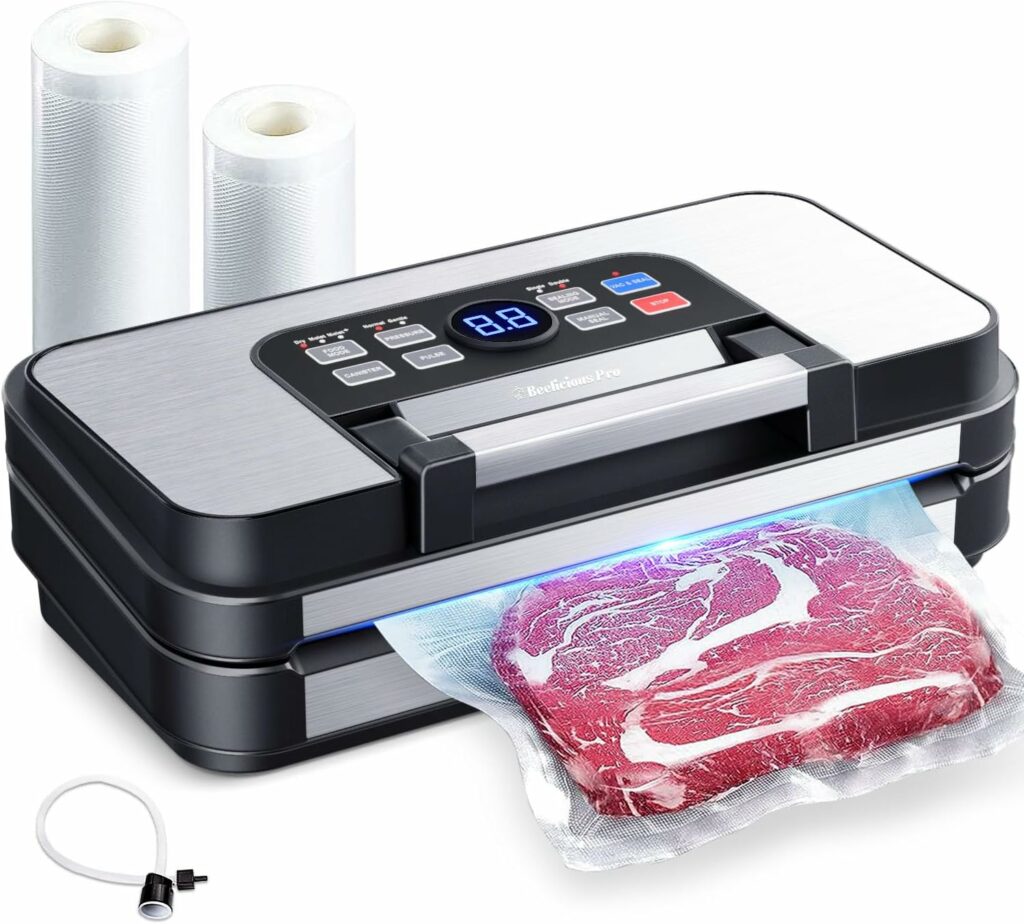
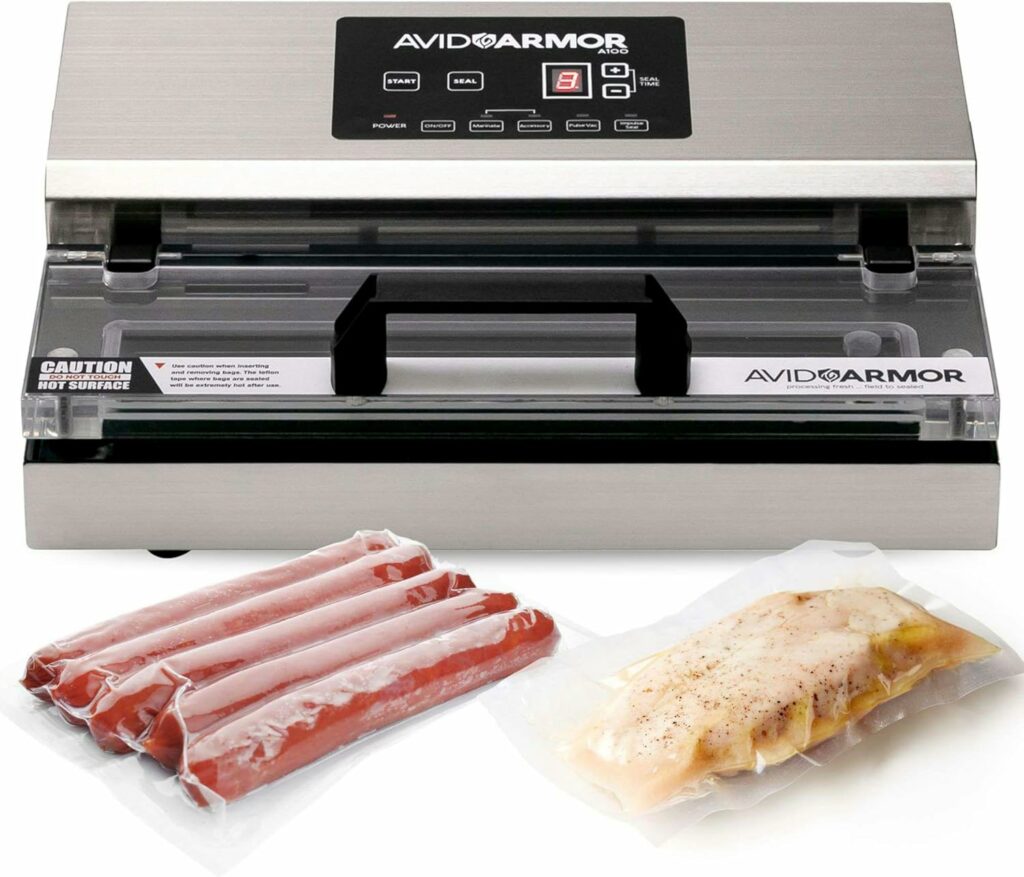
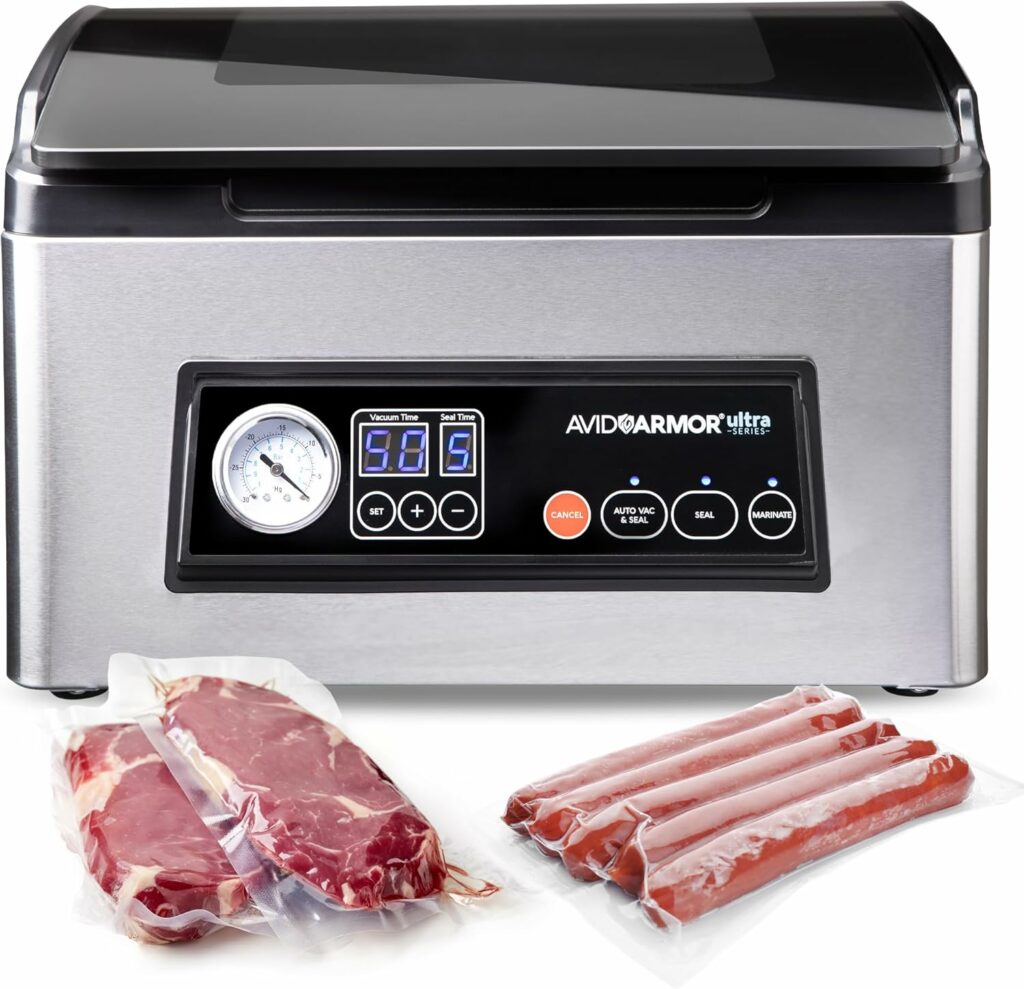
- Pick the Right Sealer: A heavy-duty vacuum sealer works best for wild game. Some models have settings that handle juicier foods, which is useful for fresh cuts.
- Use Quality Bags: Heavy-duty vacuum bags are more resistant to sharp bones and freezing temps. Specialty bags, like the FoodSaver GameSaver, are perfect for this job.
- Seal Snugly: Watch the bag as you seal, making sure it hugs the meat tightly. If there’s still air inside, reseal. For added security, I often double seal each end of the bag to prevent leaks.
- Label All Bags: Write the type of meat and the date on every bag. This saves you from guessing games and helps with rotating older meat to the top.
- Organize Freezer: Stack bags with older meat at the top and keep your freezer below 0°F to keep meat safe.
- Protect the Bags: Bundle vacuum-sealed bags in newspaper or freezer paper to shield them from rough shelves or sharp objects that could cause holes.
From years spent preparing deer, elk, and other game in my kitchen, I’ve learned a lot about the pros and cons of vacuum sealing. I want to walk through how it works, what makes it a top choice, and whether it fits your needs better than any other storage method.
Understanding Wild Game Meat Preservation
Storing wild game is a little different from storing grocery store beef or chicken. Game meats tend to be leaner, which means they dry out more quickly and are more likely to pick up other flavors from the freezer if not packed up tightly.
Freezer burn is the top problem I encounter when meat isn’t packaged properly. It makes your cuts tough, changes their flavor, and could even force you to toss something you worked hard to bring home.
Hunters have used many ways over the years to keep their meat safe in the freezer. The main options are simple wrapping with butcher paper, using zip-top freezer bags, or investing in a vacuum sealer and sturdy bags.
Each comes with its own strengths and weaknesses, but the goal is the same: keep out air and moisture to protect the meat for as long as possible. With wild game being a valued source of protein and memories, learning the best preservation method is key.
How Vacuum Sealing Works
Vacuum sealing works by pulling air out of the bag before locking it tightly around the meat. Removing air limits the oxygen responsible for freezer burn and spoilage. Once I adjusted to using a vacuum sealer, I noticed much less wasted meat in my freezer and fewer unpleasant surprises months later.
- Easy Portioning: You can pack meat in mealsized bundles, making dinner planning a lot simpler.
- Odor Prevention: Smells stay sealed within the bag, so your freezer won’t absorb strong wild game scents.
- No Frost: With air removed, there’s little chance for ice crystals to form on the meat’s surface.
It’s important to point out that bag quality matters. Cheap or thin bags can break or leak, especially if your freezer is crowded or if the bags are jostled by other items. Higher quality, thicker bags keep your wild game protected over months of storage.

Step-by-Step Tips for Vacuum Sealing Wild Game
- Prepare the Meat: Clean off any hair, dirt, or blood, then dry the meat thoroughly with a paper towel. This step is crucial because any extra moisture will be drawn out during sealing and could weaken the seal.
- Cut to Size: Decide on the portion sizes you want and trim everything before sealing. This helps avoid trapping air pockets between strangely shaped pieces and makes meal prep much easier later on.
- Pick the Right Sealer: A heavy-duty vacuum sealer works best for wild game. Some models have settings that handle juicier foods, which is useful for fresh cuts.
- Use Quality Bags: Heavy-duty vacuum bags are more resistant to sharp bones and freezing temps. Specialty bags, like the FoodSaver GameSaver, are perfect for this job.
- Seal Snugly: Watch the bag as you seal, making sure it hugs the meat tightly. If there’s still air inside, reseal. For added security, I often double seal each end of the bag to prevent leaks.
- Label All Bags: Write the type of meat and the date on every bag. This saves you from guessing games and helps with rotating older meat to the top.
- Organize Freezer: Stack bags with older meat at the top and keep your freezer below 0°F to keep meat safe.
- Protect the Bags: Bundle vacuum-sealed bags in newspaper or freezer paper to shield them from rough shelves or sharp objects that could cause holes.
Comparing Vacuum Sealing to Other Methods
Some hunters still go with butcher paper or zip-top freezer bags, often because these are cheap and always nearby. Having tried each method for deer, duck, and rabbit, I can say each offers something different.
- Butcher Paper: It’s easy and cost-effective, but over time lets in some air. If your goal is to keep meat longer than a few months, freezer burn can creep in.
- Zip Top Bags: Very simple to use and stackable, but they let more air in compared to vacuum sealing, and can sometimes reopen if pressed in a crowded freezer.
- Vacuum Sealing: Provides a tight, watertight seal that helps maintain texture, taste, and freshness. I’ve found that my ground meat and steaks taste much fresher after long-term storage in vacuum-sealed bags.
Vacuum sealing does cost more upfront, both for the device and the bags. Still, if you process moderate to large quantities of wild game each year, you’ll save money by wasting a lot less meat.
Benefits of Vacuum Sealing Wild Game
- Longer Shelf Life: When sealed right, wild game will last 1-3 years in the freezer with little loss in quality.
- Space Saving: Vacuum-sealed bags can be stacked neatly to help you maximize freezer space.
- Better Taste and Texture: By reducing freezer burn and drying, the meat stays flavorful and tender even months later.
- No Cross-Contamination: Airtight bags close off flavors and bacteria, so there’s no mixing between foods in your freezer.
These perks make vacuum sealing much more than just a modern hype — they’re real advantages for anyone wanting to get the most from their wild game. Proper technique and patience go a long way to ensuring results that will impress at family dinners or wild game cookouts.
Potential Downsides and Considerations
No system is perfect. If you only hunt occasionally or freeze smaller amounts of meat, the device and bags might not justify their price. Also, if you don’t properly dry the meat before sealing, too much moisture in the bag can weaken the seal or potentially allow bacteria to grow.
Watch out for sharp bone edges, which can puncture bags and ruin all your efforts. That’s why I always double-check bags, particularly when packing up bone-in cuts.
Another important point is what happens during a power outage. If your freezer defrosts, vacuum-sealed meat will spoil just as quickly as anything else. Having a backup plan for longer outages is wise. And remember — safe food handling and proper freezing are always required, no matter how you pack your wild game.
That said, combining vacuum sealing for your best cuts and using butcher paper for quick storage or consumables within a couple of months is a strategy that brings together the best features of both approaches.
Real-World Uses: My Experience with Vacuum Sealing
After years of processing deer, duck, and wild pig, I truly believe vacuum sealing gives the best results in keeping wild meat fresh. The steaks and roasts I seal always look just as good after a year and a half as the day I packed them.
Freezer burn is nearly a thing of the past in my house, and the meat retains its natural flavor and color. I still use butcher paper when I want to store bones or parts I’ll use soon, but for most cuts, vacuum sealing is my first choice.
If you have plenty of wild game to store, or you want to enjoy mouthwatering meat many months later, vacuum sealing is hard to beat. If you have a tiny freezer or only hunt now and then, you could seal your best cuts and use paper for stew meat — a smart way to manage cost and quality at the same time.
Frequently Asked Questions
Does vacuum sealing change the flavor of wild game?
Vacuum sealing won’t change the taste of your meat. As long as you seal it dry and store it properly, wild game flavor will stay just as you expect when it’s time to cook.
How long does vacuum-sealed wild game actually last?
Most wild game will last between 1 and 3 years in a stable, cold freezer if the sealing is done well. I’ve cooked elk steak two years after packing it up, and the taste and tender texture were just as good as ever.
Can you vacuum seal meat with bones?
Yes, but you need to pay close attention to sharp edges. Wrap the bones with parchment paper or use extra sturdy bags to avoid leaks or holes.
Final Thoughts on Choosing the Best Wild Game Storage Method
Storing wild game the right way means you’ll get to enjoy your hard-won harvest through every season. After trying all the usual techniques, I trust vacuum sealing for most of my meat — it delivers fresher flavor, longer shelf life, and far less waste. With the right bags, a good sealer, and a careful hand, anyone can step up their wild game processing and enjoy next-level cool meals that celebrate the hunt all year long.
Most Recent Articles:
- DIY Hunting Requires Expensive High-end Gear Myth Debunked

- Reviewing Compact Rangefinders For Precision In DIY Hunting

- Common Misconception: DIY Hunting Is Only For Experienced Pros

- How To Choose The Right Handheld GPS Device For Solo Hunting

- Smartphone-integrated GPS Mapping For Hunting And Hiking

- Modular Backpack Tree Stands For Hunting

As always, stay safe, enjoy the journey, and please try to leave it cleaner than you found it. If you have any comments, questions, ideas, or suggestions, please leave them in the comment section below, and I’ll get back to you ASAP. You can follow us on YouTube: Man Art Creations for videos of our DIY Adventures.
P.S. Thanks so much for checking out our blog; we really appreciate it. Just so you know, we may receive a commission if you click on some of the links that appear on our site. This helps us keep our content free and up-to-date for everyone. We appreciate your support!

